
Several months ago I found some old wooden ladders in a skip around the corner from our flat. As with most of the things that I drag off the street, fully intending to beautify in some way, they sat in the corner of our living room taking up precious space and not really doing much. Recently however, I found a great use for them, turning them into a set of shelves for all the incredible amount of other things that also take up space in our living room.
So here's my HOW TO make shelves out of an old ladder and some old shelving planks (which I also found on the street).

The original ladders I dragged off the street

The finished shelves with all stuff on them!
STEP 1 - Decide Your Space
The first thing I did, before building anything, was to decide exactly where the shelves were going to sit as a finished item. Ironically the space I chose for them was the small recess in our living room where the ladders had already been sitting for a number of months.
STEP 2 - Measure & Cut Top Shelf
Having decided on a suitable location, I took the FRONT and BACK of the ladders apart at the top hinges (I actually left the ironmongery bits of the hinges attached to the ladders, to give a bit of rustic appeal). I then held the BACK (non-runged) side of the ladders vertically at one end of the allotted space and the FRONT side of the ladders at an angle at the other end of the space (see diagram).
Now, this is the part where if you have a third arm you should definitely use it. Or, if like me you don't have a third arm, you might want to get someone to help you. The trick is to hold the FRONT (runged) side at just the correct angle, so that the RUNGS are HORIZONTAL, allowing the horizontal shelves to mate up with each rung nicely. I used a spirit level to tell me when the rungs where lying horizontally and then had my helper hold the ladder at that angle.
With everything set up like this, you are ready to take a measurement for the top shelf. Measure from the inside of the top rung to the inside of the BACK ladder upright. Then cut your first length of shelving plank to this length. Tada, your first shelf is born.


What's holding everything up - simple brackets and screws
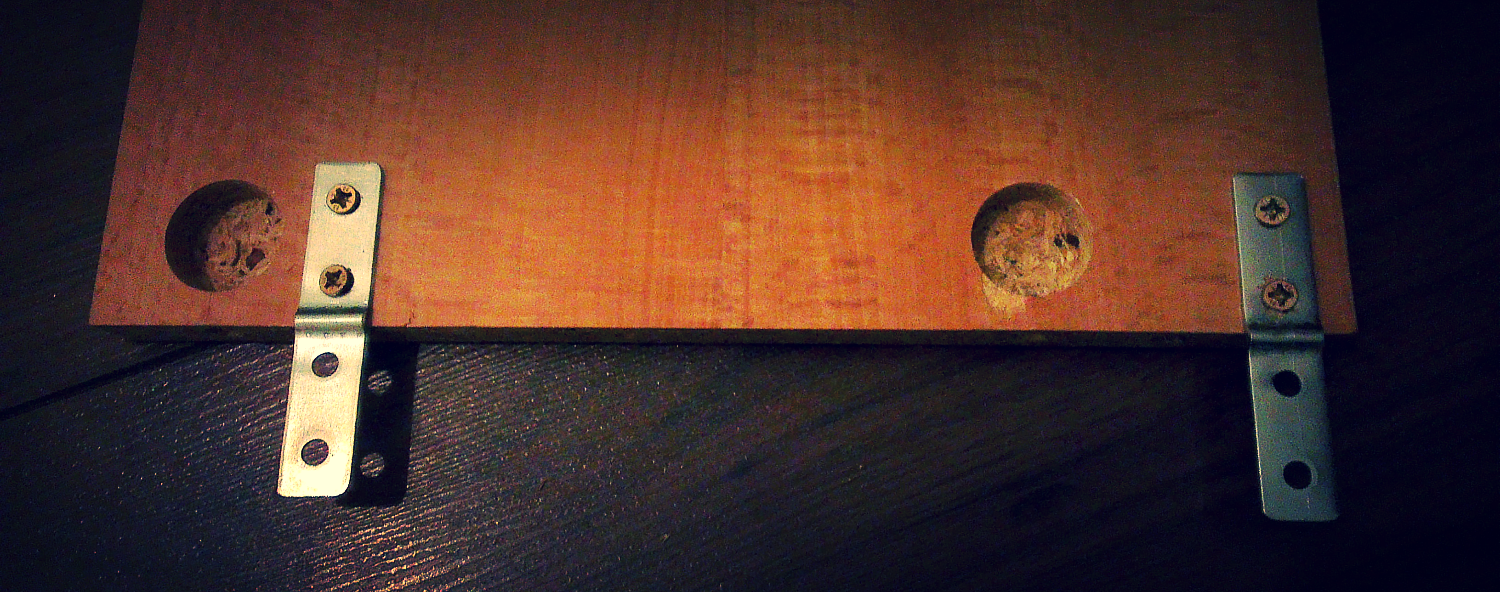
Two flat brackets go on the end of each shelf, allowing them to be attached to the underside of each ladder rung.
STEP 3 - Install Top Shelf
To install each of the shelves I used some very simple corner brackets and wood screws. I bought a packet of brackets big enough to give me 4 brackets per shelf (one at each corner). I then used a vice to flatten half of these brackets, but if you wanted to you could simply buy flat brackets.
The flat brackets are used to attach one end of each shelf to the underside of the rungs, and the corner brackets are used to attach each shelf to the BACK upright of the ladder (see diagram). I found that the easiest way to do this was to firstly attach the brackets to the shelf itself. This way you simply hold the shelf in place and screw the other side of the bracket into the ladder.
To install the top shelf I butted it (with brackets already attached) up to the inside face of the top rung, then screwed the flat bracket into the underside of the rung. I then asked my helper to butt the other end of the shelf up to the BACK upright of the ladder, while I used a spirit level to ensure it was horizontal and screwed the corner brackets in.
(NB - I use a Makita pistol drill for drilling in wood screws. This brand of drill is second-to-none and most trade professional swear by it!)

Once you have the top shelf in place, you're off to a great start; You can now lose that third arm (or extra help), since your top shelf should hold the leaning ladder and back piece roughly upright. Although you may still experience a lot of wobble!
The other good thing about starting with the top shelf is that you now have your ladder held at the correct angle to measure all the remaining shelves; The top shelf essentially acts as a spacing guide for the rest the shelves. Aaaaannnd....the other nice thing about putting the top shelf in first is that it gives you great access for your drill as you start firing in the rest of your shelves, since each new shelf will have nothing below it to block the way.
STEP 4 - Install Remaining Shelves
Once I had my top shelf in place I continued on to install the rest of them, working my way down the rungs. For each shelf I measured the space between the rung and the BACK upright of the ladder, cut the shelf to length and installed it in the same manner as the top one.
One thing I noticed: As I made my way down, installing each shelf, the whole structure became increasingly rigid. This is obviously a good sign. By the time you reach the bottom rung, you should have a fairly rigid structure.
IN PART 2.....
I will talk about the dividers that I put in to add a bit of design character and improve rigidity further. I'll also talk about the very satisfying process of using Annie Sloan chalk paint to achieve that well worn, but playfully colourful look.
To make sure you don't miss the next installment of this HOW TO, you can sign up to receive our blog updates below. Or to just get updates on comments from this one blog, use the sign-up at the top right of the comments box.


As more shelves are added the whole structure becomes more rigid.