
By Susie Haigh,
Textile Accessory Designer, podnip
an Instructor at The Stitchery
Welcome back Sewalongers. Is that a word? It is now.
I hope you all had fun choosing your fabric. What did you pick? Today we’ll take a look at machine appliqué. I make that distinction, because traditional appliqué is hand-sewn.
What is Appliqué?
It’s the method of securing one piece of fabric on top of another. You don’t need to be fluent in French to work out that it means ‘applied’ – one piece of fabric applied to another.
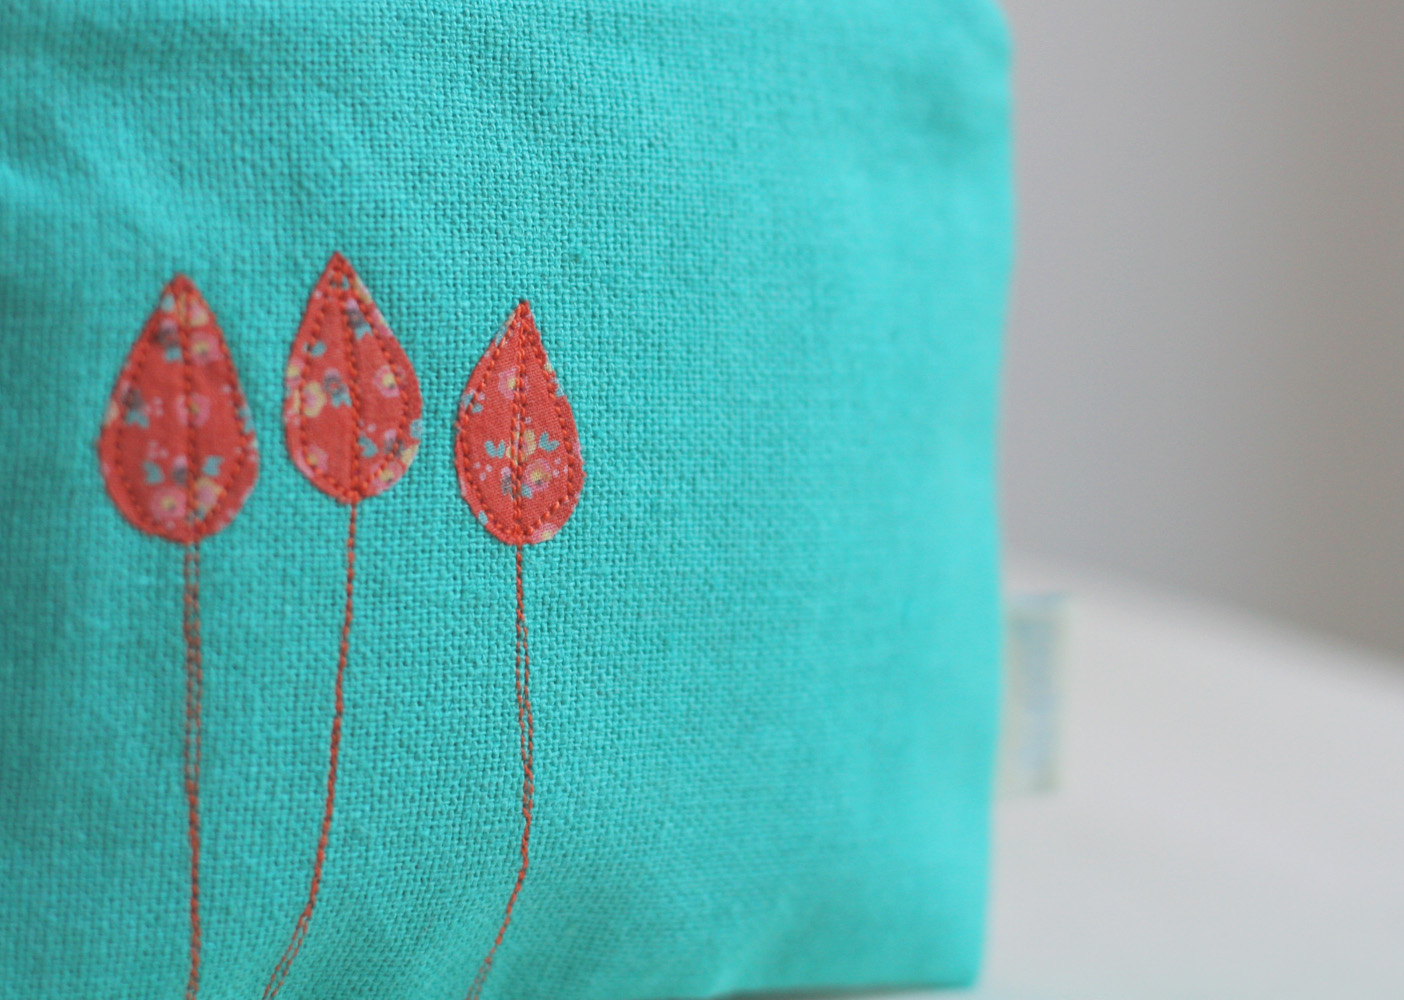
Machine appliqué on one of my Podnip accessories
In traditional appliqué the edges of the fabric pieces are turned under and sewn to the background with a blind or slip stitch.
This decorative technique has been used for hundreds of years. In fact thousands of years. The Egyptians, were busy creating appliqué bits and bobs back in the day. Apparently one of the earliest surviving examples dates from 980 BC: a ceremonial funeral canopy stitched onto Gazelle hide. I’m thinking we should aim for something a little less exotic on our Sewalong. I’m not sure anyone wants to receive a funeral themed gazelle cushion for Christmas.
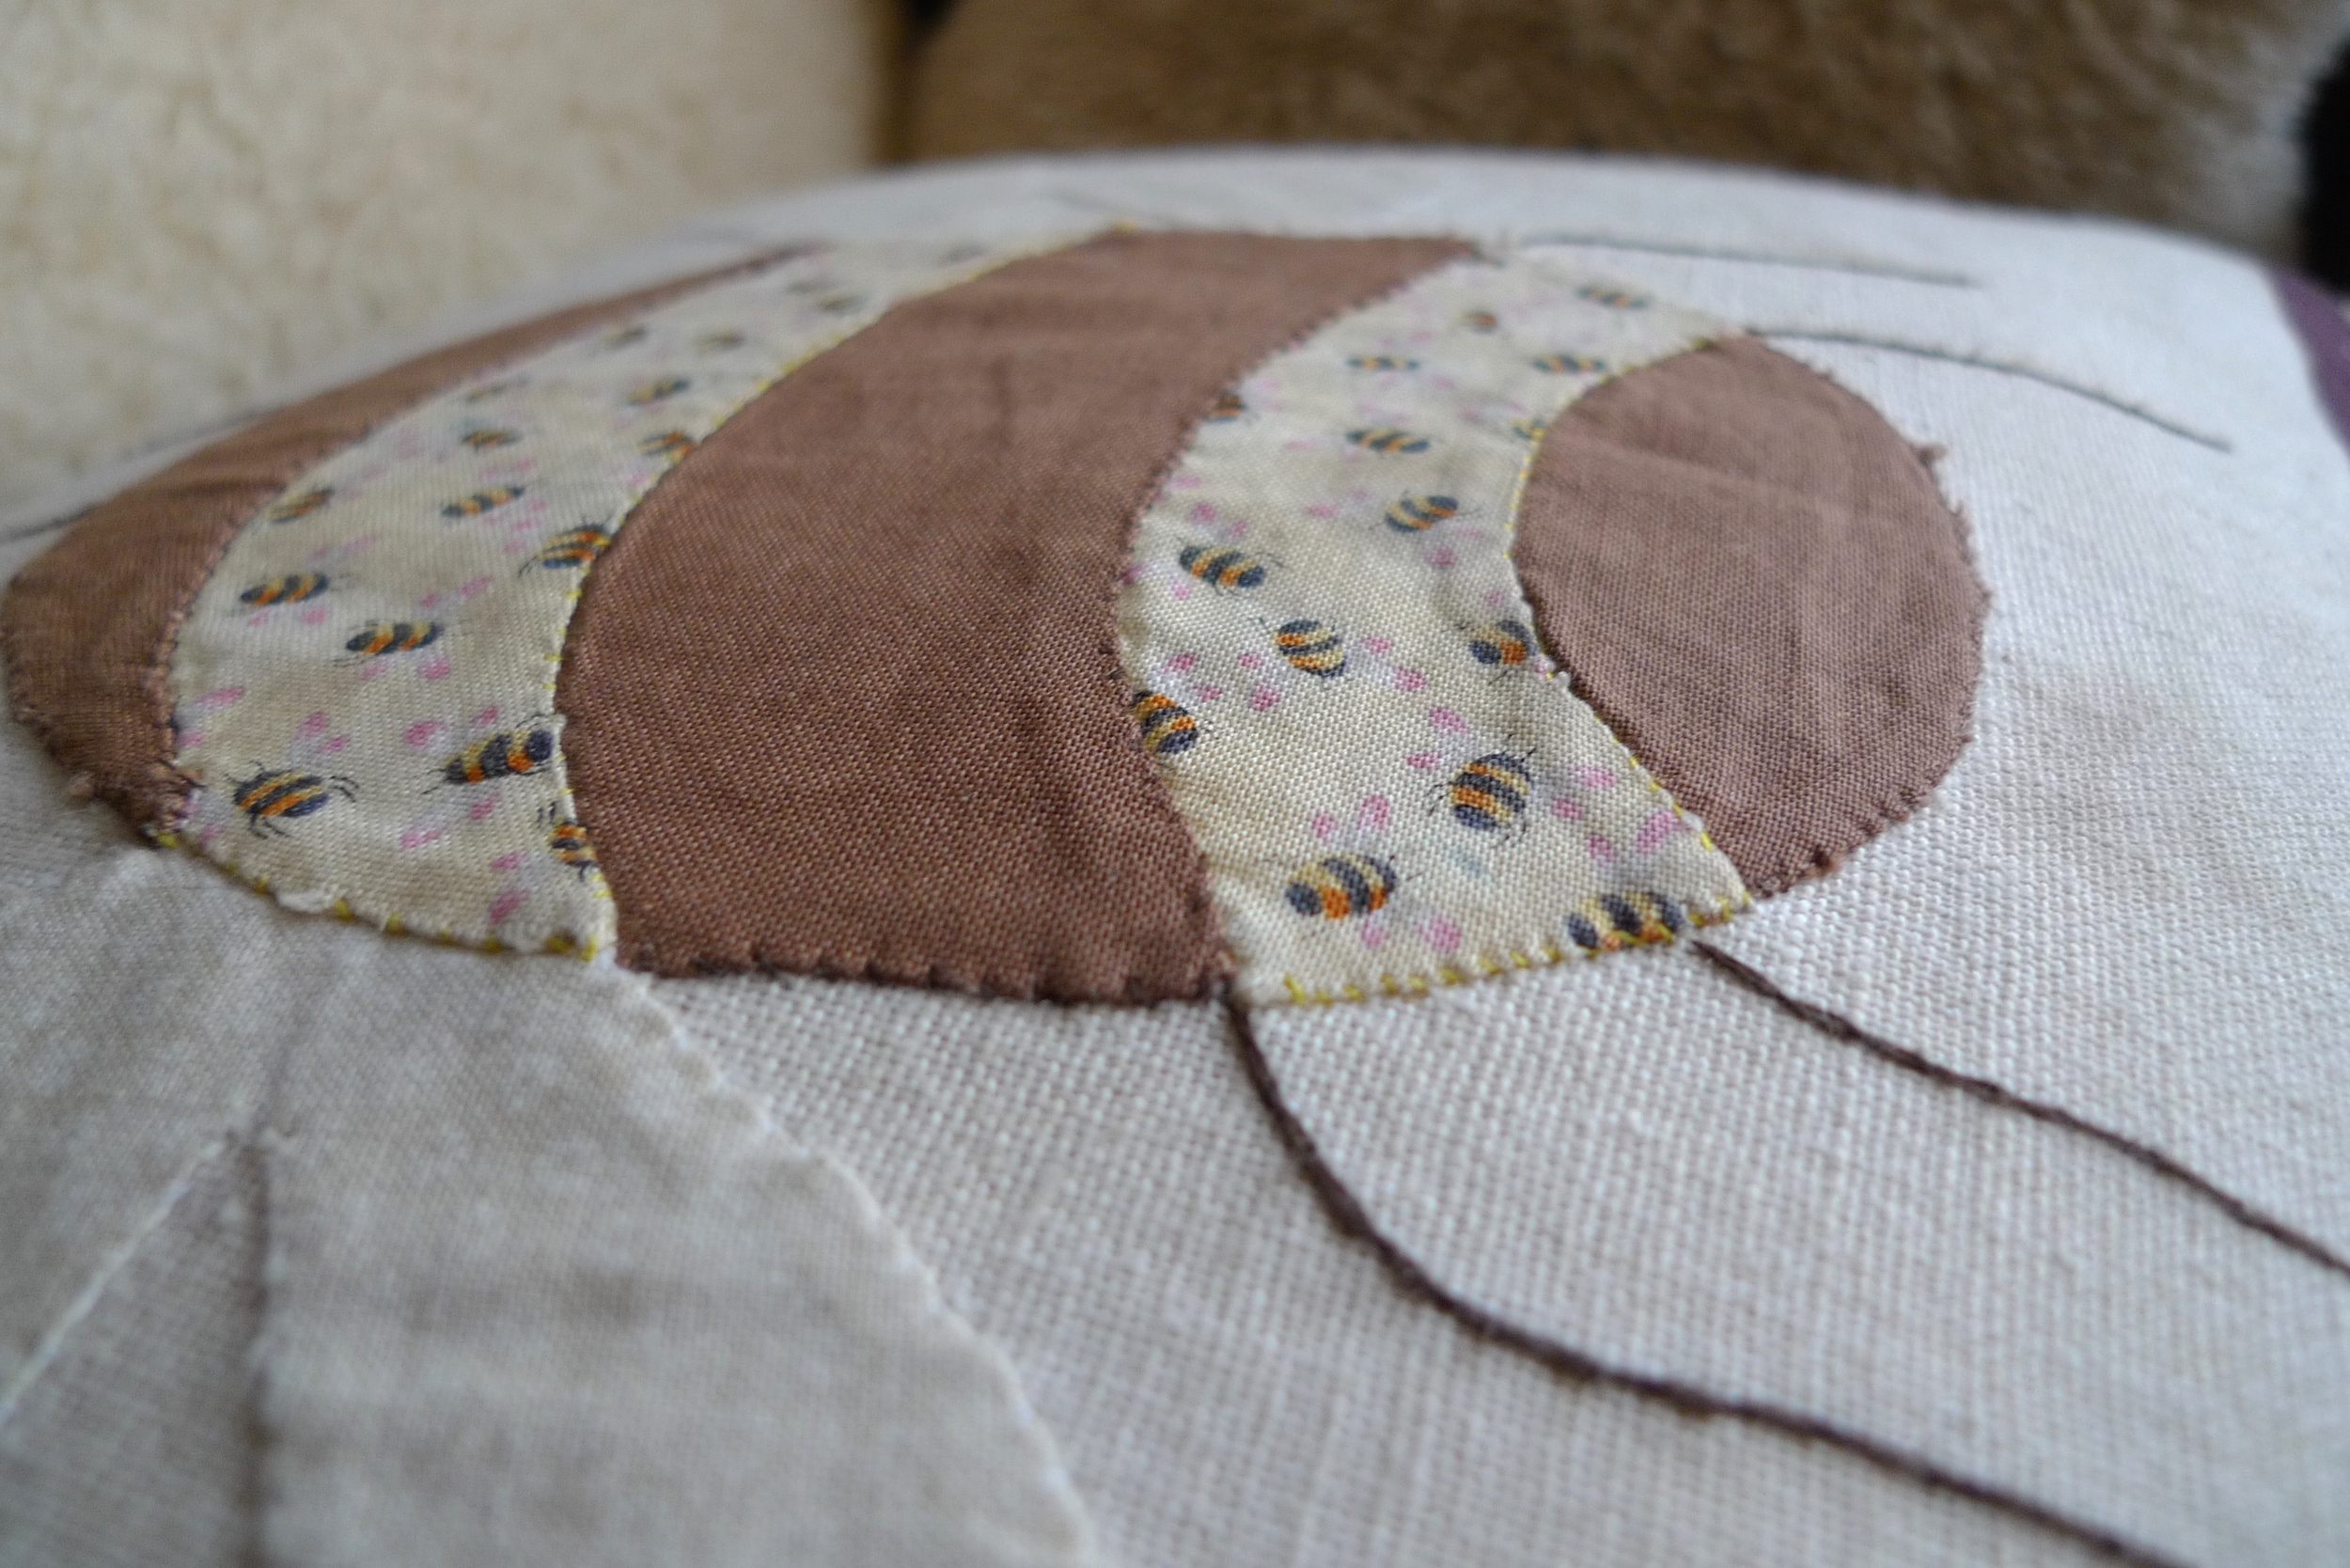
My sister used traditional appliqué to make the bee cushion below, which was a gift for my daughter. You can see the tiny stitches holding the fabric pieces down.

The long and the short of it (mainly the long) is that hand stitched appliqué is beautiful, but time consuming. So my friends, with a grand flourish (cue drum roll), I give you a modern alternative: machine appliqué! Ta da! Invented for those who are all about results and less about spending hours painstakingly hand-stitching fabric to Gazelle hides by lamplight.
Machine Applique
Machine appliqué involves sewing fabric shapes to a background fabric. But rather than using hand-stitching techniques, the pieces are machine stitched down. This is often, but not exclusively, done with either a Satin Stitch or a Straight Stitch.
A Satin Stitch is a dense zigzag that creates a slightly raised ‘border’ round the appliqué shape and completely covers all the raw edges. The effect is neat and professional, with a bold and definite line. The alternative, straight stitch, gives you a more subtle line. You can see the raw edges of the fabric, so it is a less defined border with a more casual, loose looking finish.

Satin stitch appliqué

Straight stitch or raw edge appliqué
And of course you can combine both in one piece, like in these lovely heart appliqués produced by students at The Stitchery.

Mistakes in satin stitch tend to be more glaringly obvious, so a wonky line shows up and tends to look fairly awful, whereas straight stitch is a bit easier and more forgiving of wobbles.
I love using appliqué in my designs, mainly because it’s a way of working with my little bits and pieces of fabric. I particularly like vintage textiles, so bed sheets from the 60s or old clothes of my mum’s will find a new lease of life as an appliqué design on a purse.
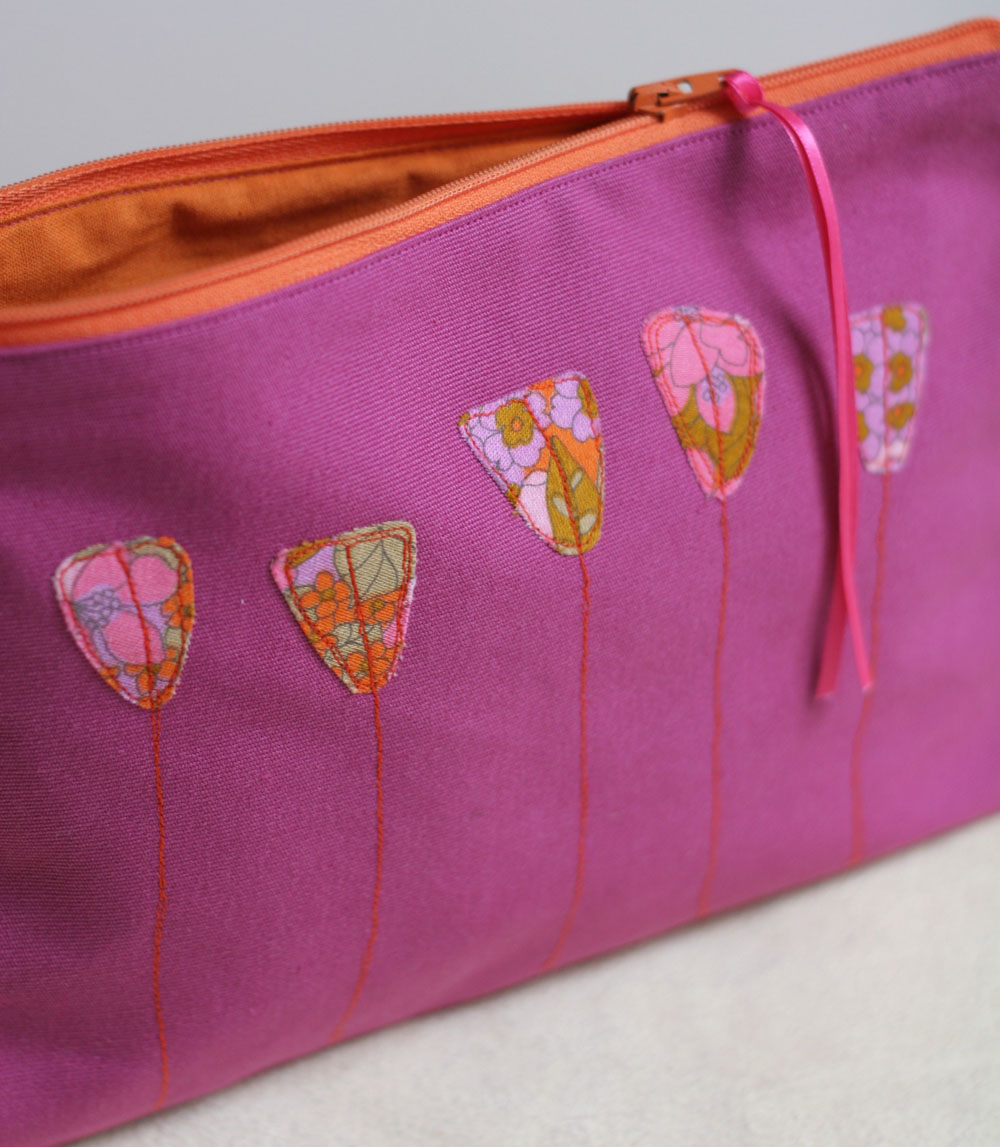
Mum's blouse from the 1970s finding a new home on a makeup bag!
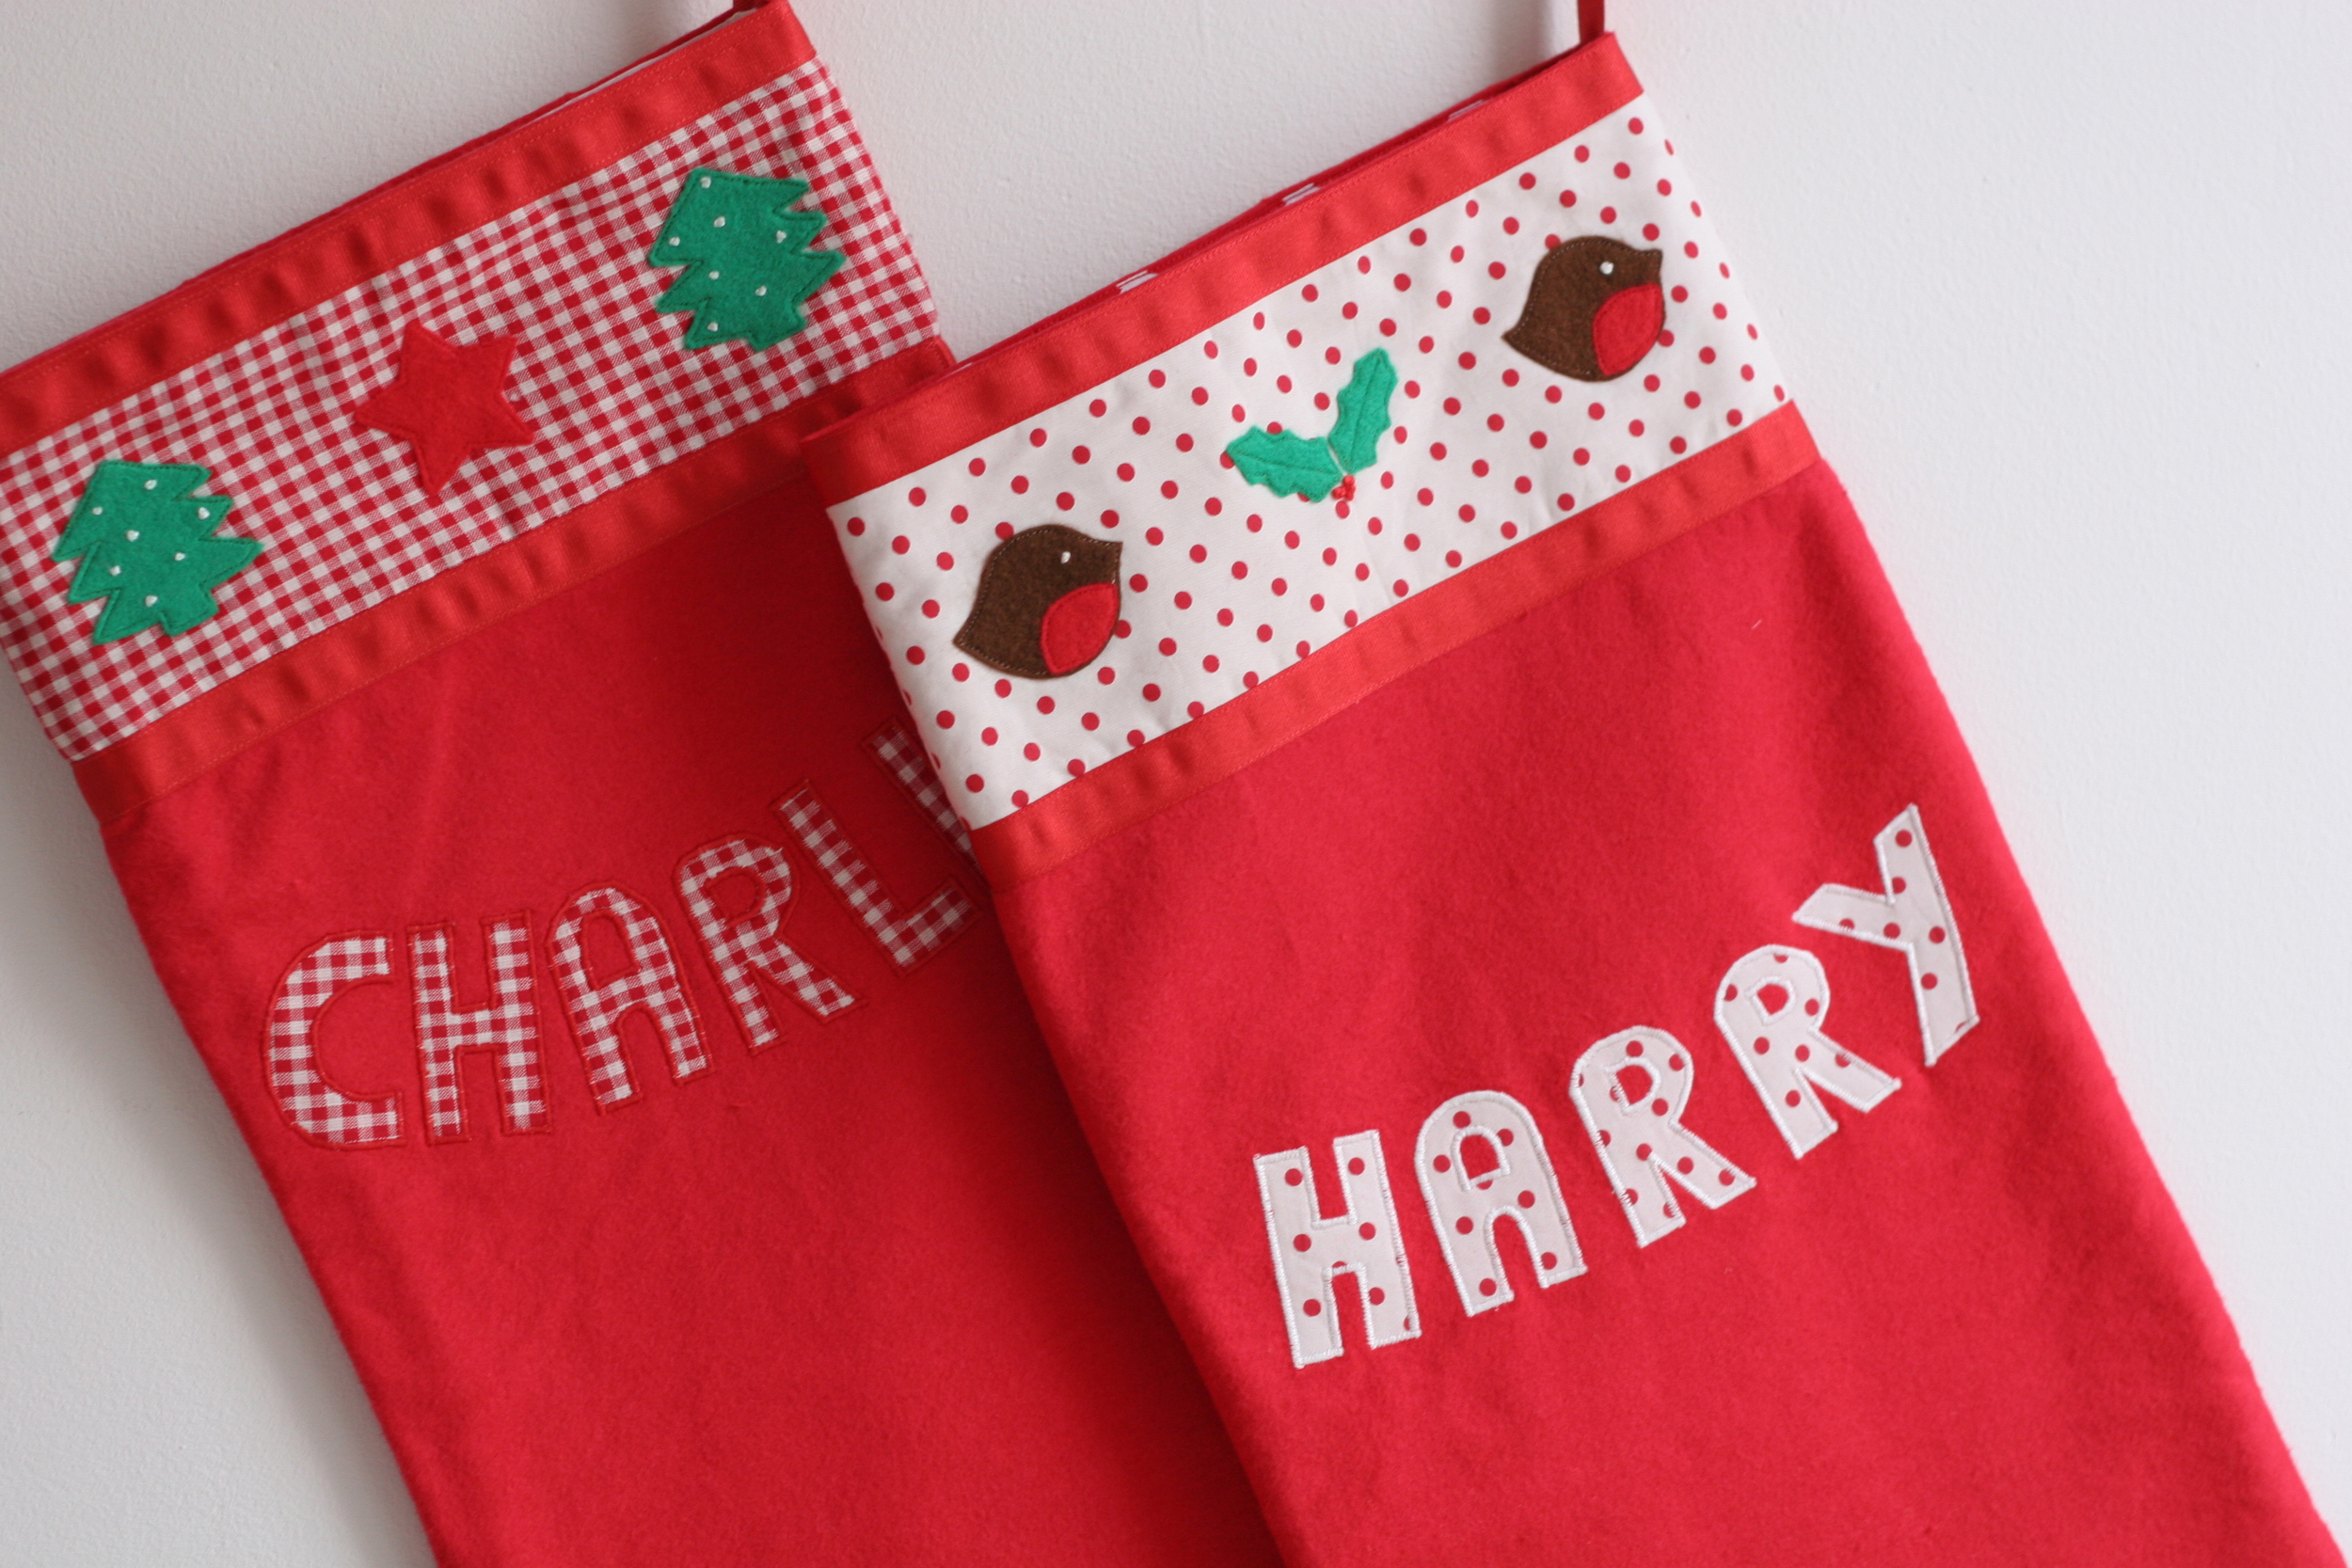
My preference is to use straight stitch appliqué: It just suits the pod nip, 'hand drawn' aesthetic better. And, being honest, it’s quicker and easier than satin stitch. However, sometimes satin stitch is the look I want. These Christmas stockings for a friend use a mixture: satin stitch for the bold outline on the names, and a more subtle straight stitch for the little motifs in the border.
Preparing Your Fabric Pieces
Sewing shapes on accurately is made a whole lot easier if you secure them to the fabric in some way first. There are various ways of doing this. For example, you can use basting spray or quilters fabric glue sticks. These are both temporary adhesives that you can spray or apply to the fabric pieces. Or you could pin your shapes to the background and then baste them into position using a hand sewing needle and thread (silk thread is great for this kind of basting, as it is smooth, strong, and won’t leave marks in your fabric).
My preferred method is to use a product like Vilene Bondaweb. I use this stuff all the time and love it. You buy it by the metre or in flat sheets pre-packaged. The glue sheet has a paper backing, which makes it really easy to work with.
STEP 1 - CUT OUT LARGER PEICES
To use this method, first cut a piece of bondaweb slightly smaller than the piece of fabric you are working with. Lets say you want to use triangle shapes in your design; then you should cut a rectangle of fabric big enough for all your triangles, plus a piece of Bondaweb just slightly smaller.

STEP 1 - Cut out fabric and Bondaweb sections
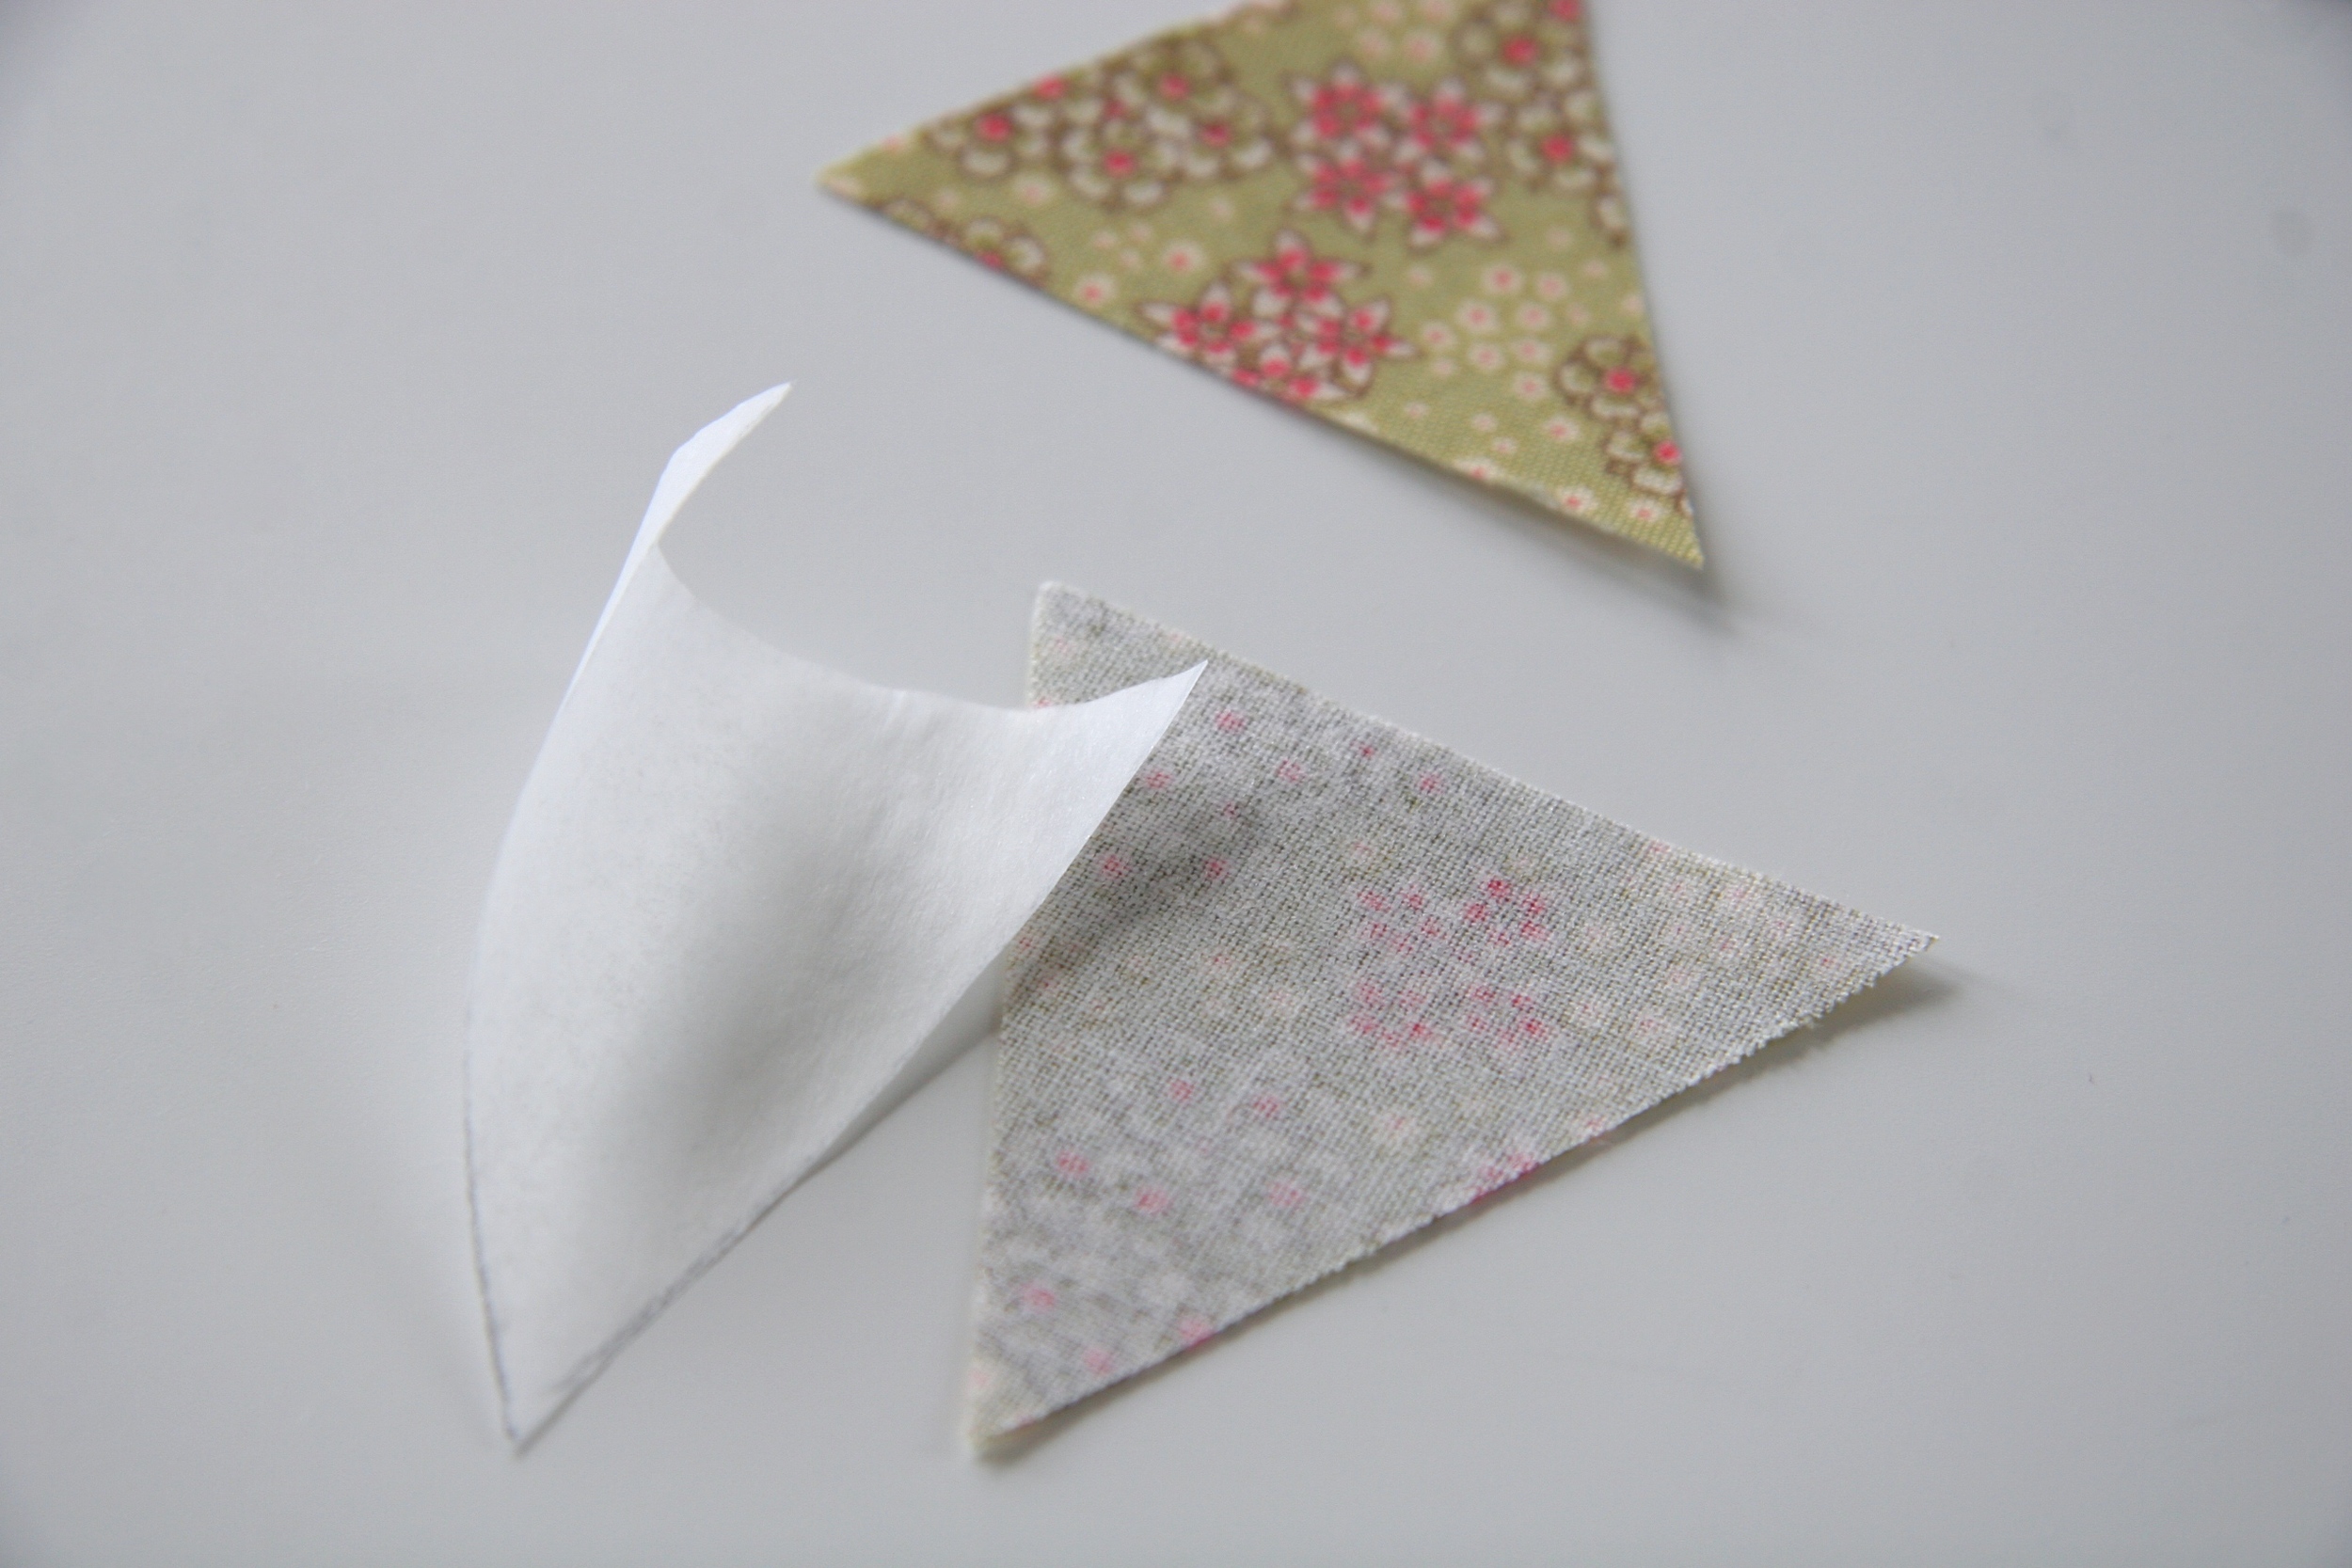
STEP 2 - FUSE BONDAWEB
Next you're going to fuse the Bondaweb to your fabric. To do this, place it glue-side down onto the 'wrong' side of the fabric, and then press a dry medium iron over the top (wool setting). Hold down for 5-10 seconds at a time, gently lifting and moving on to the next section until you've pressed the whole piece of Bondaweb onto the fabric. Make sure you do hold the iron down for the right amount of time; the glue needs to melt and adhere to the fabric. Otherwise the glue might not transfer to the fabric properly.

STEP 2 - Pressing and fusing the Bondaweb to the fabric.
STEP 3 - TRANSFERRING YOUR SHAPE
You have a few choices when it comes to transferring your design:
Option A - Before ironing the bondaweb to your fabric, place it over your printed black and white line drawing and trace. You can tape the line drawing and the bondaweb sheet to a sunny window using masking tape to make it easier to see the lines. Or use a lightbox if you happen to have one!
Option B - Fuse the bondaweb to your fabric and then draw round a stencil. You can buy stencils from art & craft shops or use things you find lying around at home; cookie cutters for example. Or you can make your own stencil by printing out drawings or letters from the computer, sticking them to thin card and cutting out with scissors or a scalpel. Remember if you are using letter stencils to reverse them when you place them on the back of the fabric.

Option B - using a stencil

Option C - freehand!
Option C - Fuse the Bondaweb, but instead of using a stencil, just draw freehand. A different effect, and this tends to be the way that I work.
STEP 4 - CUT OUT YOUR SHAPES
Once you’ve drawn out all your shapes, cut them out. I keep a pair of small sharp appliqué scissors just for this job.

STEP 4 - Cut out your shapes
STEP 5a - Peel off the backing
STEP 5 - PEEL AND BOND
Peel off the paper backing. Place your pieces glue-side down onto your base fabric and press a medium to hot iron over the top. Again for 5-10 seconds so that the glue really has time to work its magic.
The instructions tell you to place a damp pressing cloth between your iron and the appliqué, but I have to admit I often don’t bother! But if you are working with delicate fabrics or you’re worried about holding a hot iron down on your fabric for that long, then a pressing cloth is always a good idea. You won’t singe your fabric that way or get horrible shiny marks. Don’t push your iron around loads, just hold it down, then lift, re-positon and hold it still again. Otherwise you risk shifting the shape before the glue is set.

STEP 5b - Pressing

So Bondaweb helps to position the fabric, but it also keeps the edges neat and helps them to stop fraying. And there are other brands too…I feel like I’m on the BBC now. Steam-A-Seam is one….there may be others. In America its called 'Wonder Under'. Which sounds much more glamorous; like some 1950s ladies underwear. Anyhow, fusible glue sheets with paper backing is what you’re after, so if that’s what the packet says and you’re in a sewing shop, you’ll be fine.
All About Needles
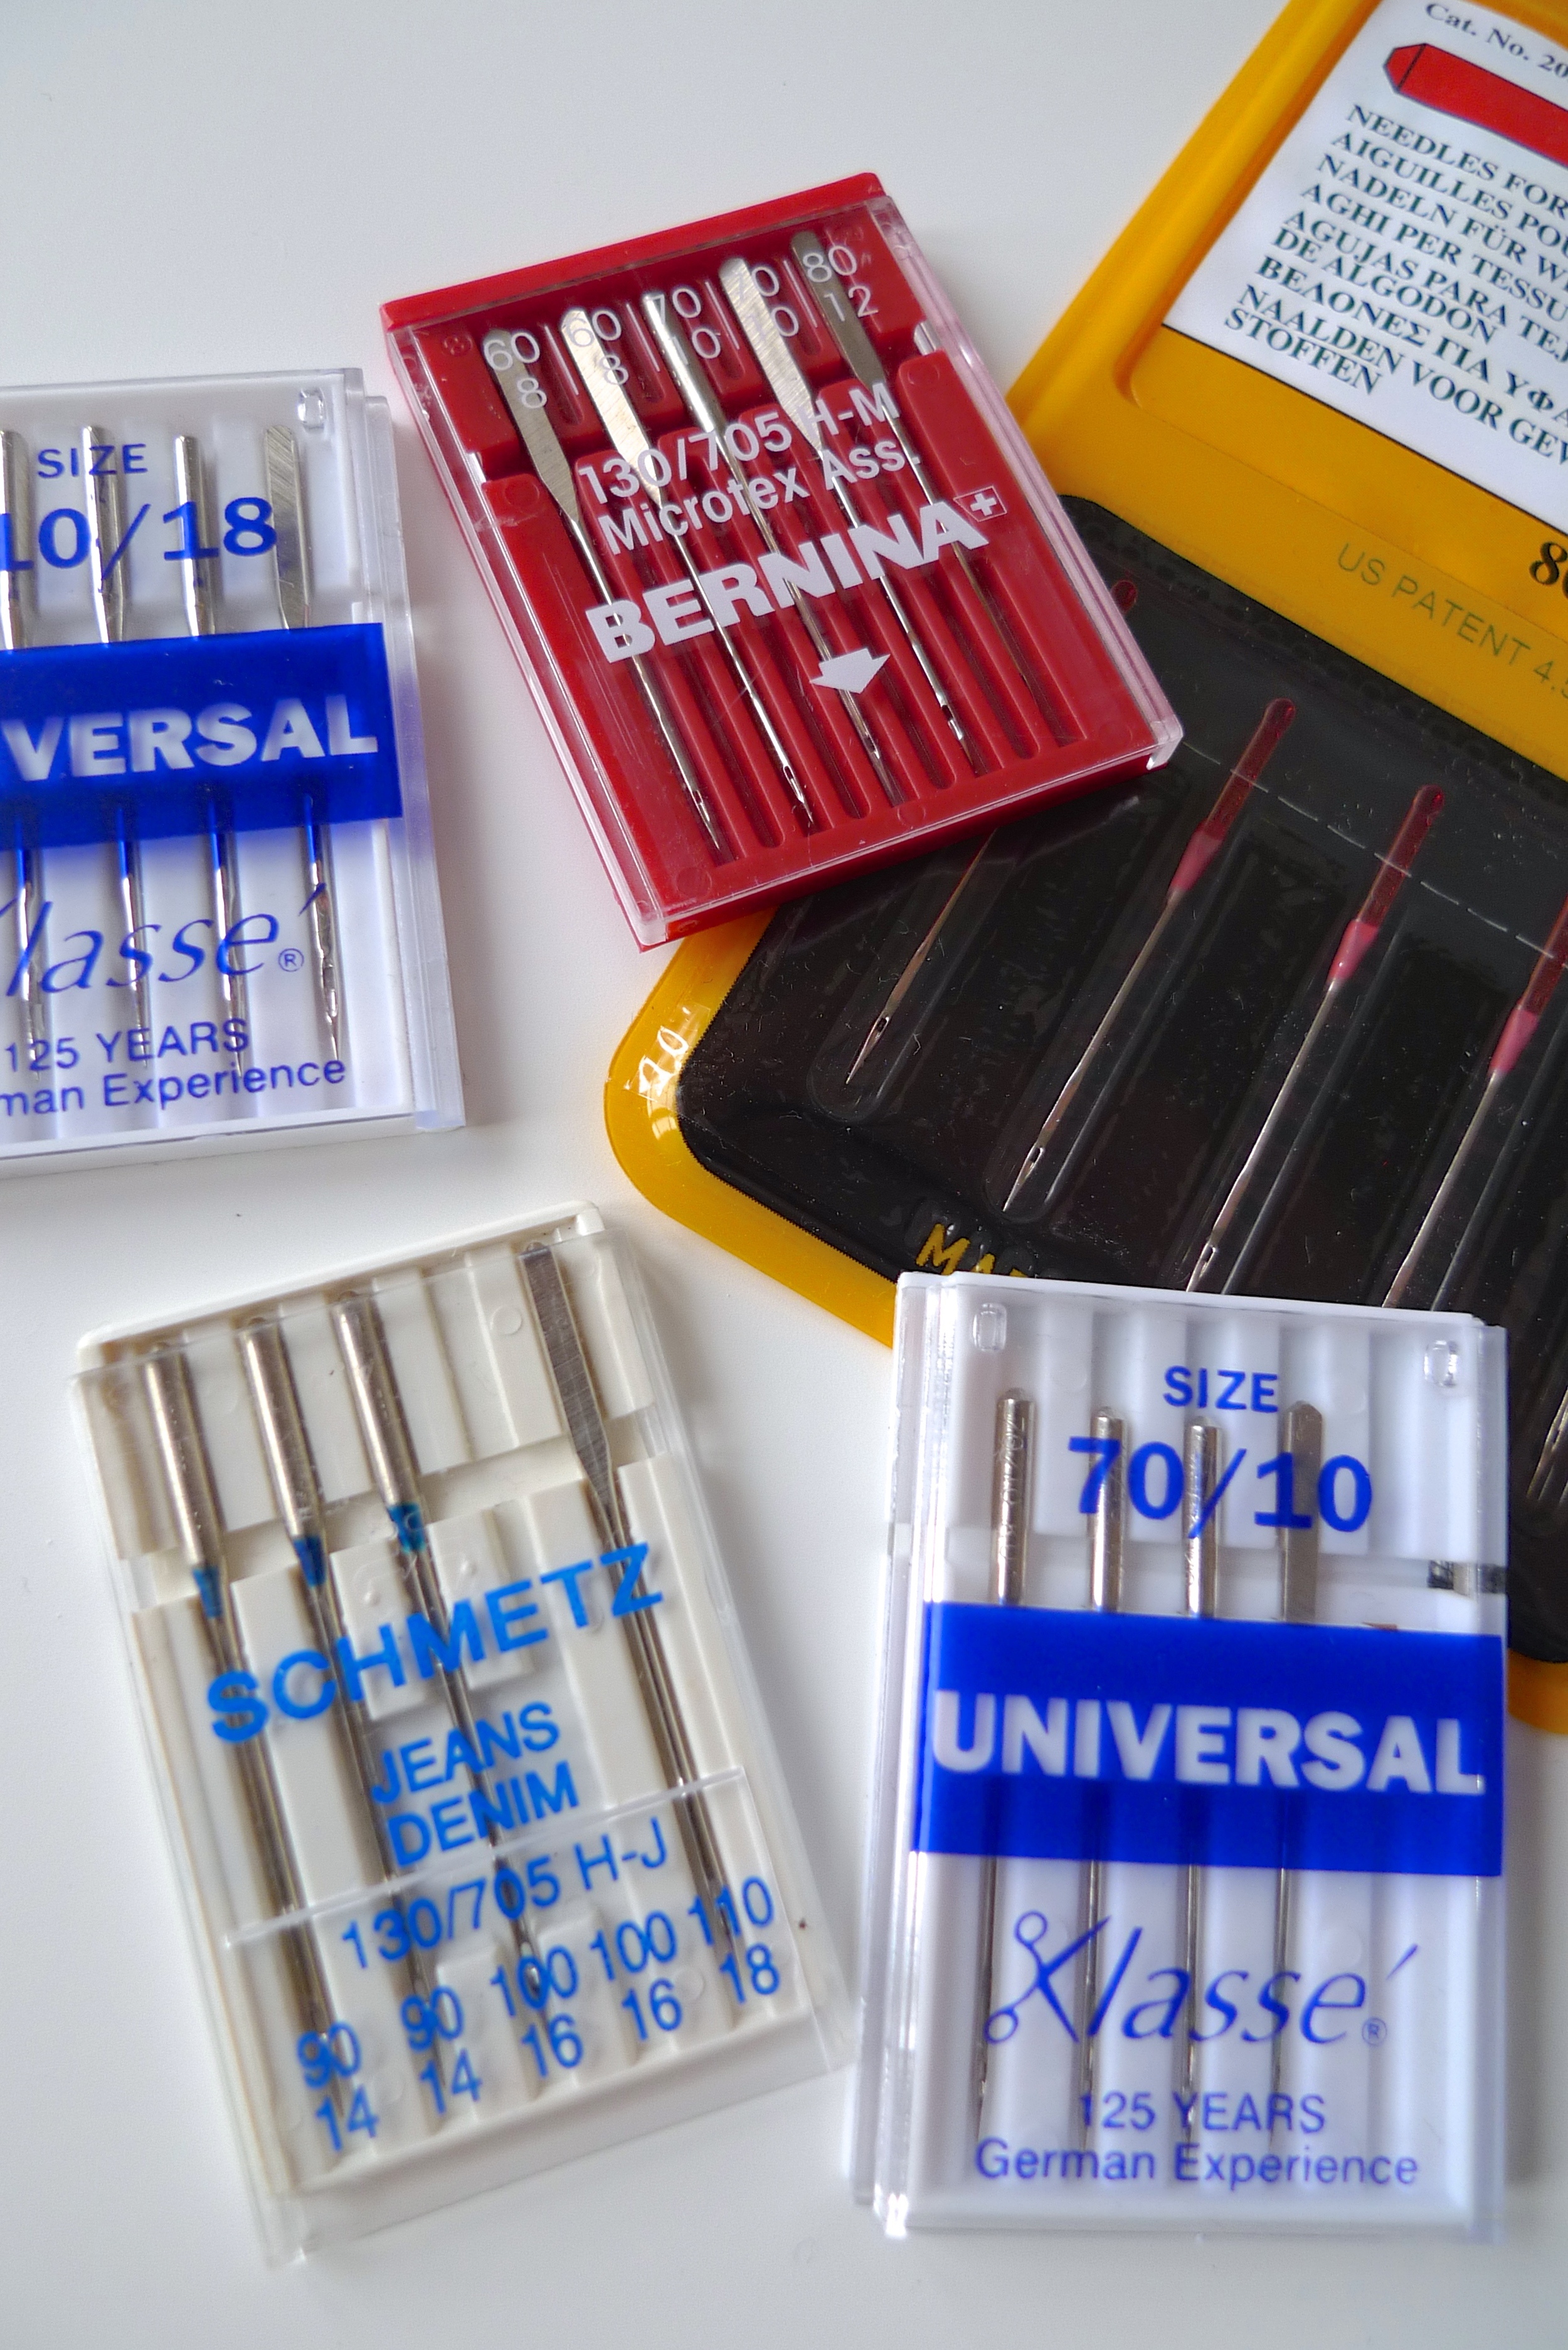
If you’ve stood looking at needles in a fabric shop, you’ll know there are about a gazillion different types, all with slightly mysterious sounding names and numbers on the packets.
Universal size 80 needles are your basic catch-all needle. If it says 80/12, then the second smaller number refers to the American sizing system. Most needles also say 130/705 just to really confuse you. These numbers refer to the system used by home sewing machines, which means they are needles with a flat shank and will fit all the major domestic brands.
It is good to have a supply of universal needles in different sizes. I use them for all kinds of sewing: dressmaking, embroidery, constructing purses, piecing together quilts. They are a bit like the needle equivalent of your sew-all polyester thread we talked about last Friday.
However, although you may do most of your sewing with a universal needle and sew-all polyester thread (I know I do), it is really useful to know about and experiment with other needles and threads. Because appliqué involves making stitches that you can see, it’s important to get the quality of the stitches as good as you can. So, at the very least make sure you’ve cleaned the lint out of your machine and put in a fresh, sharp universal needle, of the correct size. Size 80 is the suitable for medium weight cottons. If you’re using heavier upholstery-weight fabrics a size 90 would be more appropriate.

Topstitch Needles
I like using topstitching needles for my decorative / appliqué / free motion sewing. They have a larger eye and reduced friction on the thread. They also have sharper tips than universal needles, so the needle punctures the fabric very cleanly. I use Superior Threads topstitch needles, but Hemline/Klasse and Schmetz are two other good brands you can easily find. You’ll definitely need a topstitch needle if you are using heavy topstitch or metallic threads.
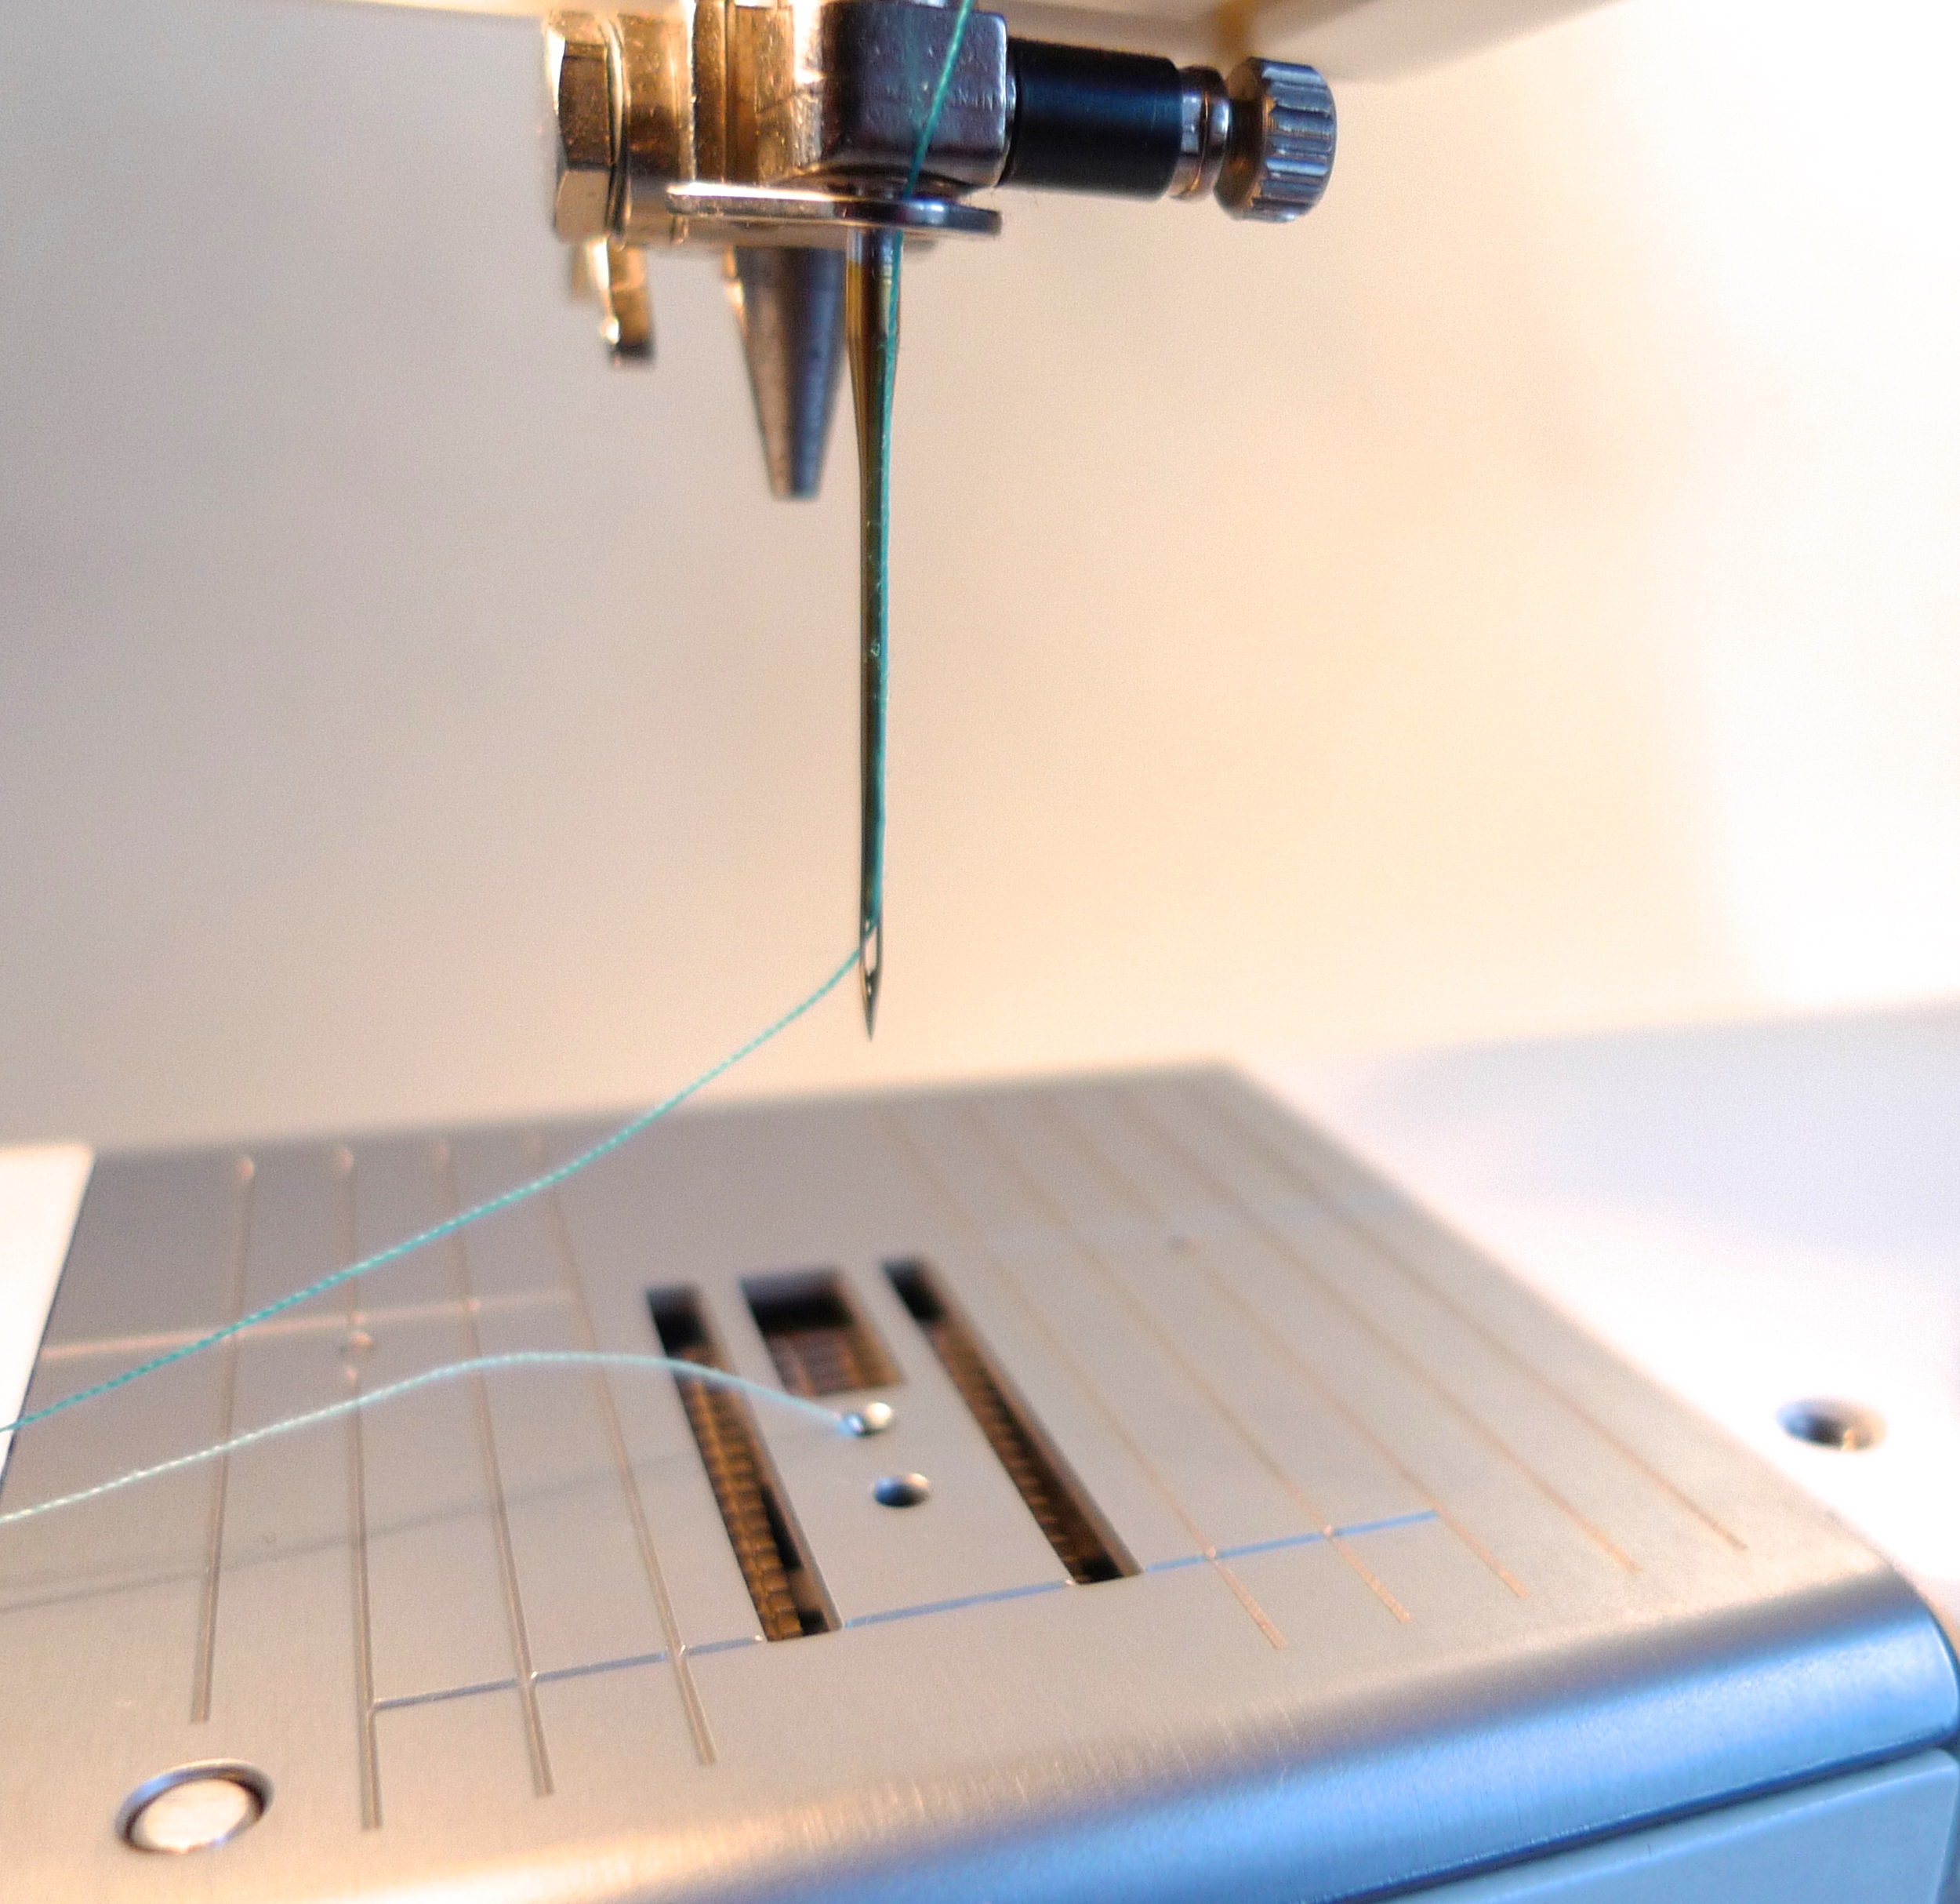
Straight stitch needle plate and topstitch needle
Straight Stitch Needle Plate
A Straight Stitch Needle Plate is another really handy piece of kit. This is a special plate with small round hole for the needle; rather than the wider, oval-shaped hole you’ll see on your standard plate. The wider hole needs to move side-to-side to form zig-zags. However, delicate fabrics can sometimes be pulled down into the hole by the feed dogs. The extra support the Straight Stitch Needle Plate provides, in conjunction with a sharp/microtex or topstitch needle, results in a very clean and precise line of straight stitches. I tend to use this combo when dressmaking with delicate fabrics, but I also use it for straight stitch appliqué.
Threads
Moving onto thread - another zone of confusion! The all purpose polyester threads mentioned last week will work absolutely fine for the appliqué we’re doing on the Sewalong….. so if that’s what you’ve got, then you’re good to go.
If you're partial to a bit of glitter, try a high shine rayon embroidery thread or shimmery metallic one. You might want a heavy topstitch thread for a more defined hand embroidered look, or a very fine, lightweight thread for an invisible subtle finish.
One thing to think about, when experimenting with different threads, is your choice of bobbin thread. You don’t necessarily want to use the same spool thread top and bottom in the way you would with normal sewing.
For example, you should use a smooth polyester thread in the bobbin if you are sewing with metallic thread, rayon embroidery thread or thick topstitching threads. The important thing to remember is that it is fine to use different fibres and weights top and bottom to get different results. Just be aware that you may need to tweak your tension when experimenting in this way.
If you buy a thread that is not your usual polyester sew-all, then my suggestion is to look it up on the manufactuer’s website. There you will find advice about what uses the thread is designed for, and tips on the correct needle type and size, and a note on the bobbin thread if this should be different.

Left to right: Gutermann silk, Gutermann polyester topstitch, polyester sew-all Mettler metrosene (red stitching and green thread), Superior ‘Bottom Line’ extra fine poly, Madeira embroidery cotton, Gutermann rayon embroidery, Gutermann metallic
Superior threads website has great advice about decorative sewing threads and needles. Their home sewing reference chart gives you a guide to all the different threads, their uses, suitable needles and appropriate bobbin threads to use. (Barnyarns are a UK supplier if you want to buy from them).
Beyond that the best way is to buy some different types of thread, and topstitch needles of different sizes, go home, and spend a fun couple of hours just experimenting!
A Note On Metallic Threads
Metallic thread can be particularly tricky, so it's worth mentioning a few tips I've picked up along the way:
- Put your metallic thread on an upright / vertical spool. Horizontal spools can add a twist to the thread and put stress on it, which can lead it to shred or break.
- Use a good quality polyester thread in the bobbin. I like Superior Threads ‘Bottom Line’ for this, but Gutermann Sew All polyester thread will be fine too.
- Use a size 90 topstitch or a metallic needle.
- Sew slowly and set your machine to slow if you have a speed control setting.
- Finally be aware you may have to adjust your tension; most likely lowering it. The advice is often to lower it right down to 1, but on my machine tension set at about 3 seems to work best.
Stabilisers

Gutermann 'Ultra Solvy' water soluble stabilizer
One last thing to think about before we start: If your cushion fabric is fairly floppy you may need to stabilise it before starting to work on your appliqué design. You can do this do this temporarily or permanently.
Tempoary Solutions
There are many temporary stabilisers available. These are layered up with your fabric before stitching through, then either torn / trimmed away, dissolved in water, or melted away with the heat of an iron. Gutermann make a whole range of these stabilisers. So if you’ve never tried them, I would recommend buying the sample pack, which comes with a selection to try.

Our selection of interfacing at The Sttichery
Interfacing
Given we’re making cushions, and the wrong side of the fabric will be hidden on the inside, my preference would be to use a permanent stabiliser.
Interfacing is a great option for this. You iron it to the back of your fabric and it will stiffen the fabric up a little, providing more support for the embroidery stitching.
Interfacing comes in different weights and you can buy fusible or sew-in. The fusible has a glue layer on one side, which you put face down on the back of your fabric and press with a warm iron. If you are adding a single satin stitched appliqué to your cushion front, you can just interface a small area behind the design element. If your design is scattered across the cushion, I would interface the whole area.
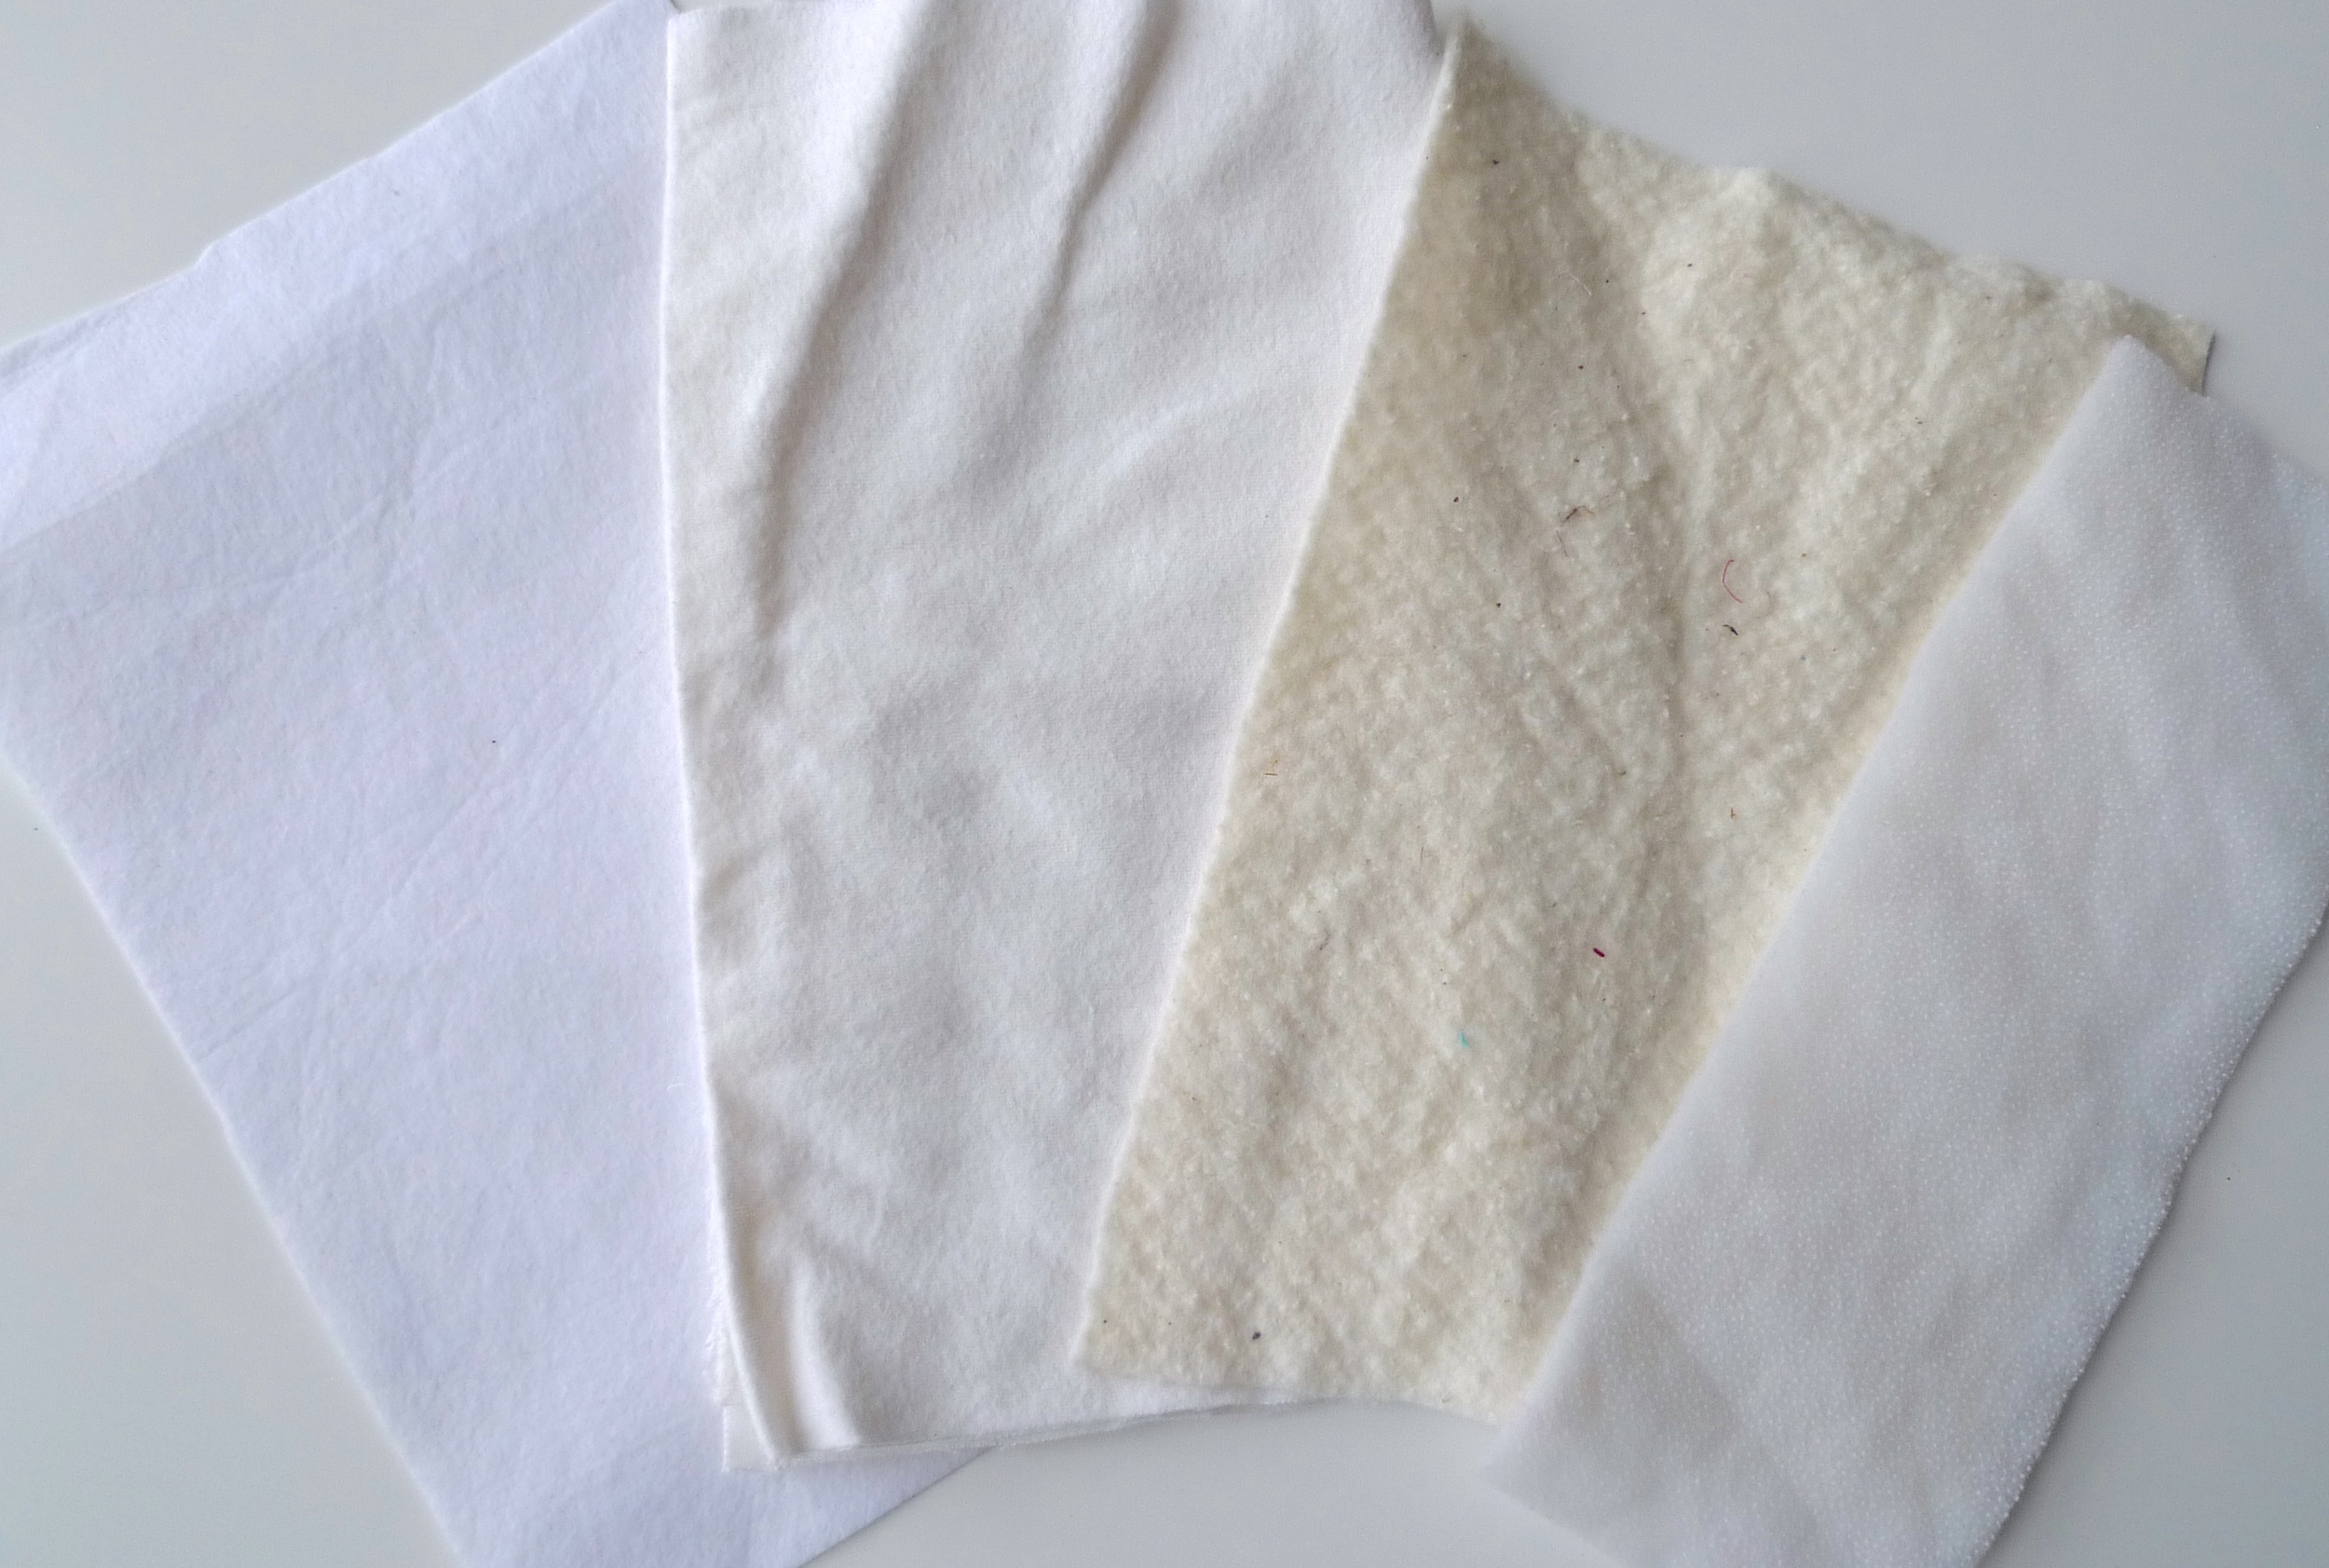
Left to right: heavy sew-in interfacing, cotton flannel, cotton batting and fusible polyester fleece
You can also add an extra layer of fabric such as batting or fleece to give it a more quilted look. I like using flannel as a soft backing: it adds a bit of structure and gives a very slight amount of soft padding, but not so much as you would get with quilt batting. If you have a fabric you wish to layer up on the back of another fabric, you can always use bondaweb or basting spray to make it fusible.
Satin Stitch Method
Choosing Your Foot
I use a Satin Stitch Foot for both types of appliqué. These feet have a wide open toe and a raised ‘groove’ down the middle which allows space for the raised welt of stitches to form. They are useful for a straight stitch too, because the open toe means you can see your work more clearly as you move around. It is really helpful to see each stitch, so that you can sew accurately round the shapes.

Selecting And Testing Your Stitch
Select the zigzag stitch option on your machine and set the stitch length to about 0.5mm and the width to about 3mm. You may need to make the stitches closer together, in which case reduce the length further down to 0.3. Similarly the width may also need adjusting. You want it to be wide enough to cover the raw edges of the fabric easily, but not so wide that it becomes ungainly. You should use a narrow satin stitch for delicate fabrics, and go a bit wider for heavier ones.
Always do a little test stitch before your start; ideally using the fabrics you are about to sew with. Practice your stitch and make sure the length and width feel right and the stitches are forming smoothly and evenly.

Test run with satin stitch
You may need to tweak the tension a little. If you can see the bobbin threads pulling up and the top threads look tight, then you need to loosen the tension by turning the dial down to a lower number (the tension dial dictates the tension of the spool thread). Inversely, if the top threads look loose, then turn the dial the other way.
Normal sewing tension is somewhere in the middle dial (around No. 5 on my machine). But quite often with decorative stitching you will find that you need to loosen the tension a little. Experiment until you are happy with the results!

Use the edge of the shape as your guide.
Satin Stitching Your Shapes
When you start stitching your shapes down, stitch slowly and keep an eye on the needle, making sure that when it swings into the fabric on the right, it is coming down beyond the raw edge of your shape.
Use the edge of the shape as your guide for sewing. Try to move smoothly and slowly round curves. Remember you can always pause, lower the needle, raise the presser foot and gently pivot your work a few degrees in order to move round curved areas more easily.
When you come to corners or sharp angles, stitch to the end, lower the needle in on the outside edge of the fabric, raise the presser foot and swing the fabric in a new direction. Lower the presser foot and begin stitching again, so the first few stitches overlap the previous line of stitching.

Pivoting at the corner
Straight Stitch Method
The process is similar with a straight stitch: Your stitching line should be consistently about 1/8” away from the raw edge. Again, take your time; I find that I use my handwheel a lot for working my way round particularly tiny little shapes. Making stitches this way gives you more precise control over where each stitch falls. You should definitely use your handwheel when you approach corners or angles. Stop a little bit short of the corner, and then take the last one or two stitches by hand.

I tend to keep my stitch length at about 2.5mm. But you can experiment with different lengths to see what you like. If you are using a heavier thread you might want longer stitches for a bolder ‘hand embroidered’ look, or very tiny ones for something more subtle and delicate.


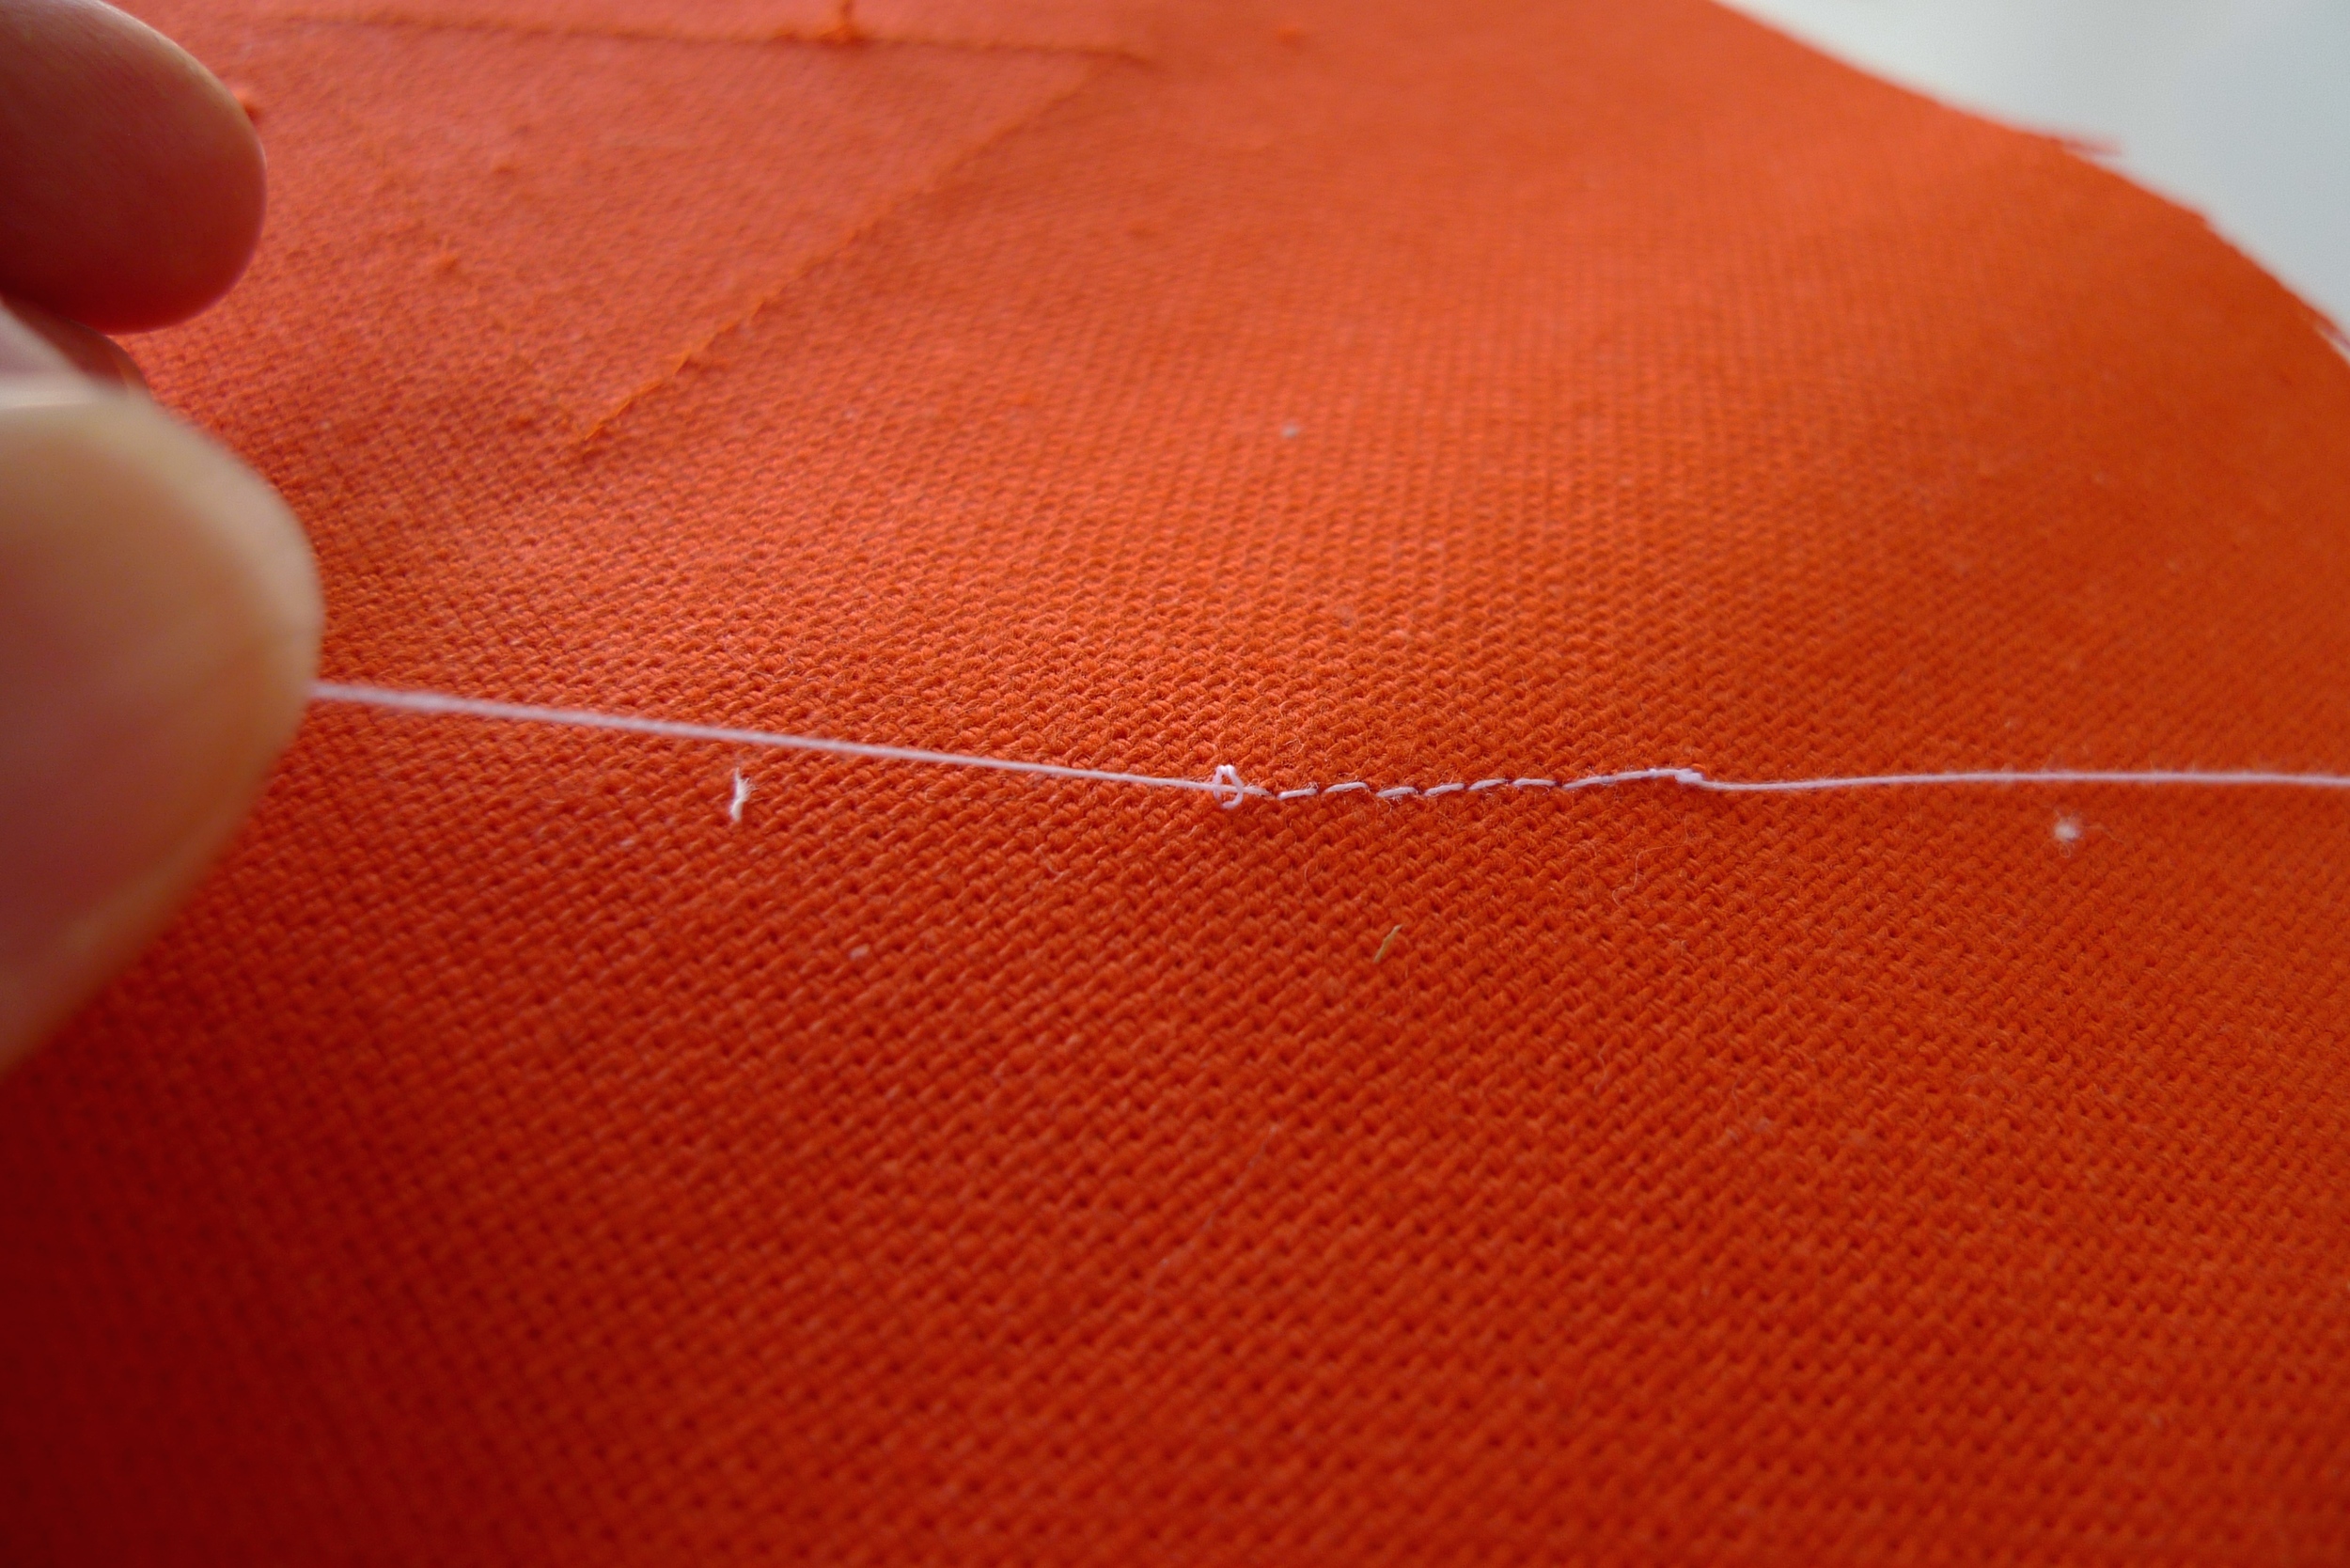
Should I Backstitch?
I tend not to backstitch with either type of machine appliqué: it can make a slightly messy spot. Instead, leave long thread tails and when you have finished stitching, then pull your work off the machine and turn it over so you are looking at the back. Gently pull the bobbin thread and you should see the loop of the spool thread peek through at the back. Put a pin under the loop and pull it up and out. Tie bobbin and spool threads together in a knot.

Happy Sewing!
Lots to think about this week. Enjoy experimenting and remember to sew a wee test first before you start on your cushion.
You'll remember last week I chose the turquoise fabric to make my cushion and gathered a pile of blue scraps to for the appliqué? Well I've been busy stitching my design, so I'll leave you with a picture of my work in progress to inspire you!

Notice my thread tails have been left, ready to pull through to the back of the work.