
Well, we're really getting down to it now. This is the last week of our Sewalong and the competition entries are due on the 31st of May. For a reminder of how to enter, and stand the chance of winning a Janome CXL301 (plus other goodies!), check out the post we put up a while back on submitting your entry.
Today our post is all about inserting the zipper. If you're doing Versions 2 or 3, this is a step you'll want to undertake before trying to insert the waistband. We'll try to get a post up for the waistband of these versions over the next couple of days.
Zippers
Before we get going on the steps for inserting the zipper, it’s worth taking a moment to familiarise ourselves with some of the items I'll be using in this tutorial.
First let’s start by looking at the zipper itself. For my Zinnia Skirt I’m using what’s called an ‘invisible zipper’, also referred to as a ‘concealed zipper’. As the name might suggest, the invisible zipper is designed so that it is not visible from the outside of the garment.
I would always recommend students to use an invisible zipper because I think it gives a more professional look to the garment. But if you happen to have purchased a regular zipper, don't fret, because you can still use it and we have a tutorial here on how to insert it.
The images below show a comparison between a regular zipper (green) and an invisible zipper (pink). You'll notice that the RIGHT side of the invisible zipper looks like the WRONG side of the regular zipper, and vice-versa.

PHOTO ABOVE: Shows the RIGHT SIDE of both the regular and invisible zipper.

PHOTO ABOVE: Shows the WRONG SIDE of both the regular and invisible zipper.
Zipper Feet
The other thing I quickly want to touch on, which will help us a bit later on, are the types of machine feet that can be used for inserting a zipper. I've shown some of these in the image below.

TOP LEFT: Adjustable Zipper Foot, TOP RIGHT: Wrench key, BOTTOM LEFT: Regular Zipper Foot, BOTTOM RIGHT: Invisible or Concealed Zipper Foot
If, like me, you're going to use an invisible zipper on your skirt, then you will need to use an invisible zipper foot. What sets these apart from regular zipper feet are the two grooves on the underside that hold the zipper teeth back while the stitch is made. Trying to do a good job of inserting an invisible zipper without one of these is nigh on impossible.
Most sewing machines come with a regular zipper foot as part of the standard set of accessories. However, I find that an adjustable zipper foot is a more useful companion when finishing the back seam of an invisible zipper. This will become clearer at a later stage in this tutorial, when we talk about finishing the back seam.
Zipper Insertion
STEP 1 – We’re going to start by inserting the left-hand-side of our zipper to the left-hand-side of our skirt back.
Open up your zipper, undoing it all the way to the zipper stop. Place your left back skirt flat on the table with the RIGHT side facing up.
Place the Zipper onto the skirt, with the RIGHT side of the zipper facing the RIGHT side of the skirt. Ensure that the teeth are 5/8” from the skirt edge and the top of the zipper tape matching the top of the skirt. Pin in place.

STEP 1
QUICK TIP
A good rule of thumb is to check that the zipper tape edge without teeth is closest to the edge of your fabric. If the edge of the zipper with teeth is closest to the edge of your fabric, then you have it on the wrong way around.
STEP 2
STEP 2 – Hand or machine baste your zipper in place along the centre of the zipper tape. I like to use silk thread for this because it pulls out nice n’ easy.

STEP 3
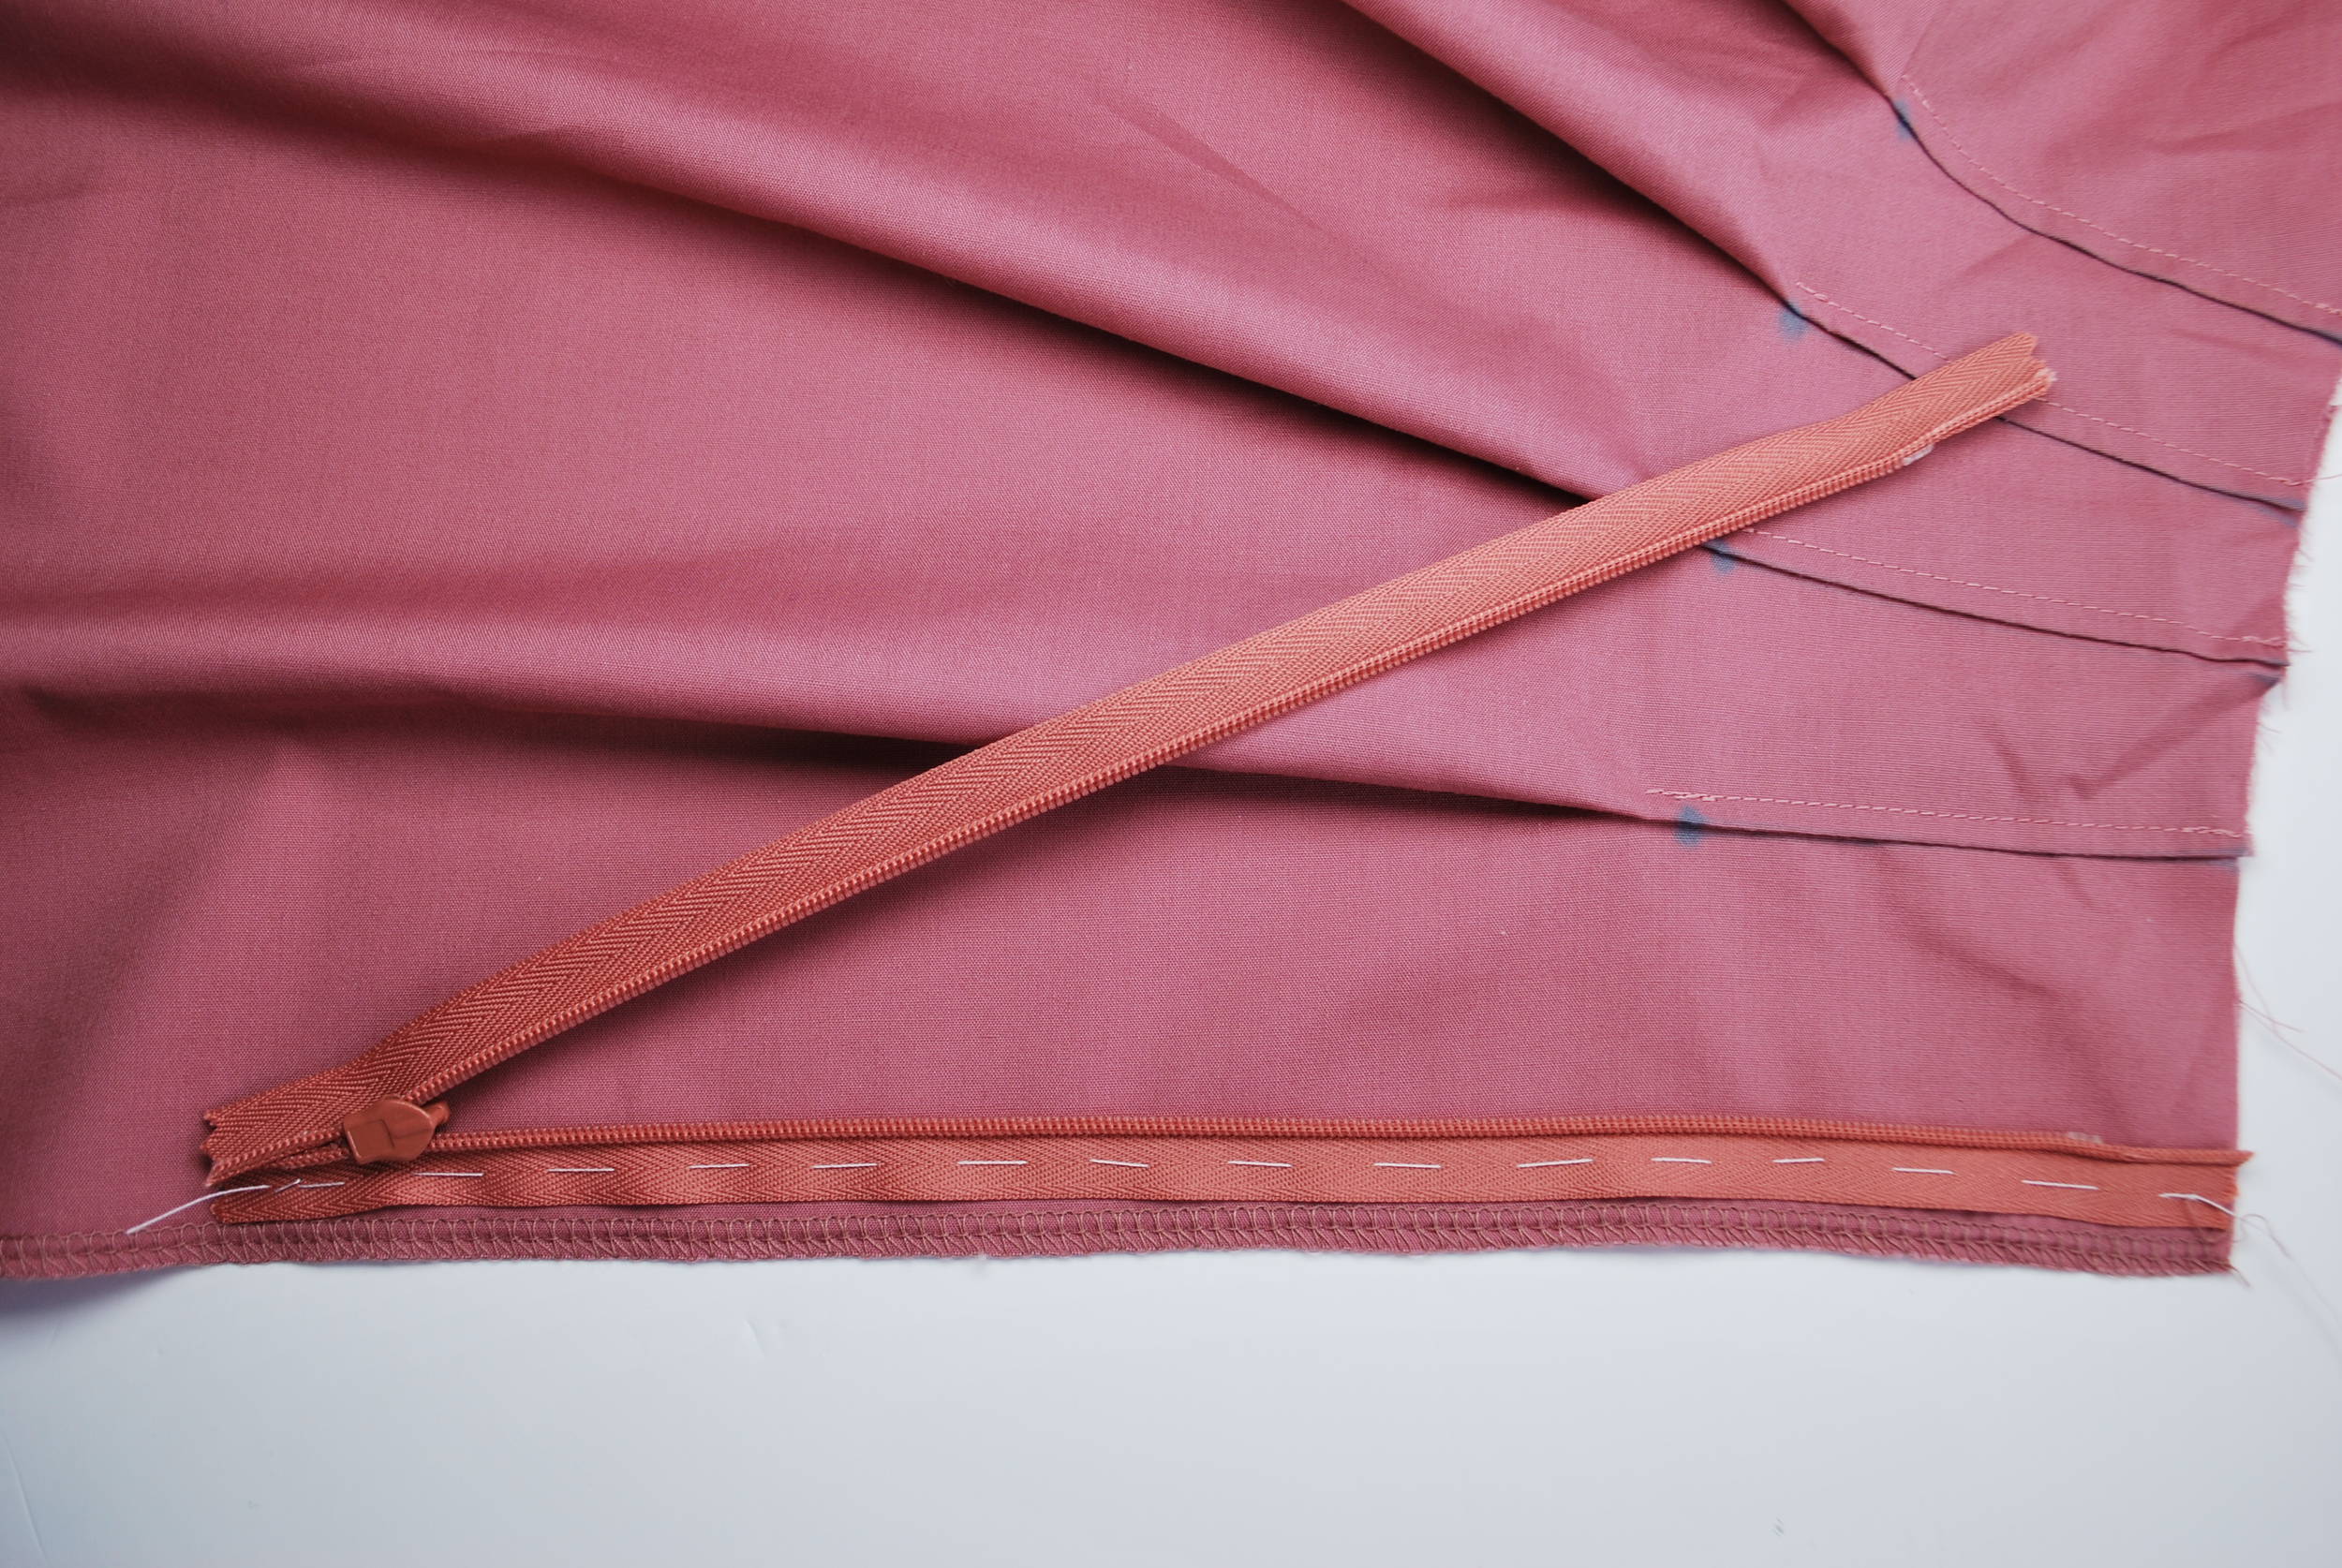
STEP 3 – Now we’re going to insert the right-hand-side of the zipper to the right-hand-side of the skirt.
Turn your skirt inside out, RIGHT side facing RIGHT side, and lay it flat like this. Lay the RIGHT side of your zipper (the side with the zipper tape, not teeth) onto the skirt, again with the teeth at 5/8” from the edge of the fabric.
One of the most common mistakes with this step is to twist the zipper, so you just want to check that you haven’t done this.
STEP 4 – Baste the right-hand-side of your zipper in place. Again, I’ve used hand basting, but it’s up to you if you'd prefer machine basting.

STEP 4
STEP 5 – At this point, before permanently sewing in place, it’s a good idea to pull up the basted zipper to check that everything looks right. Double check that there are no twists.
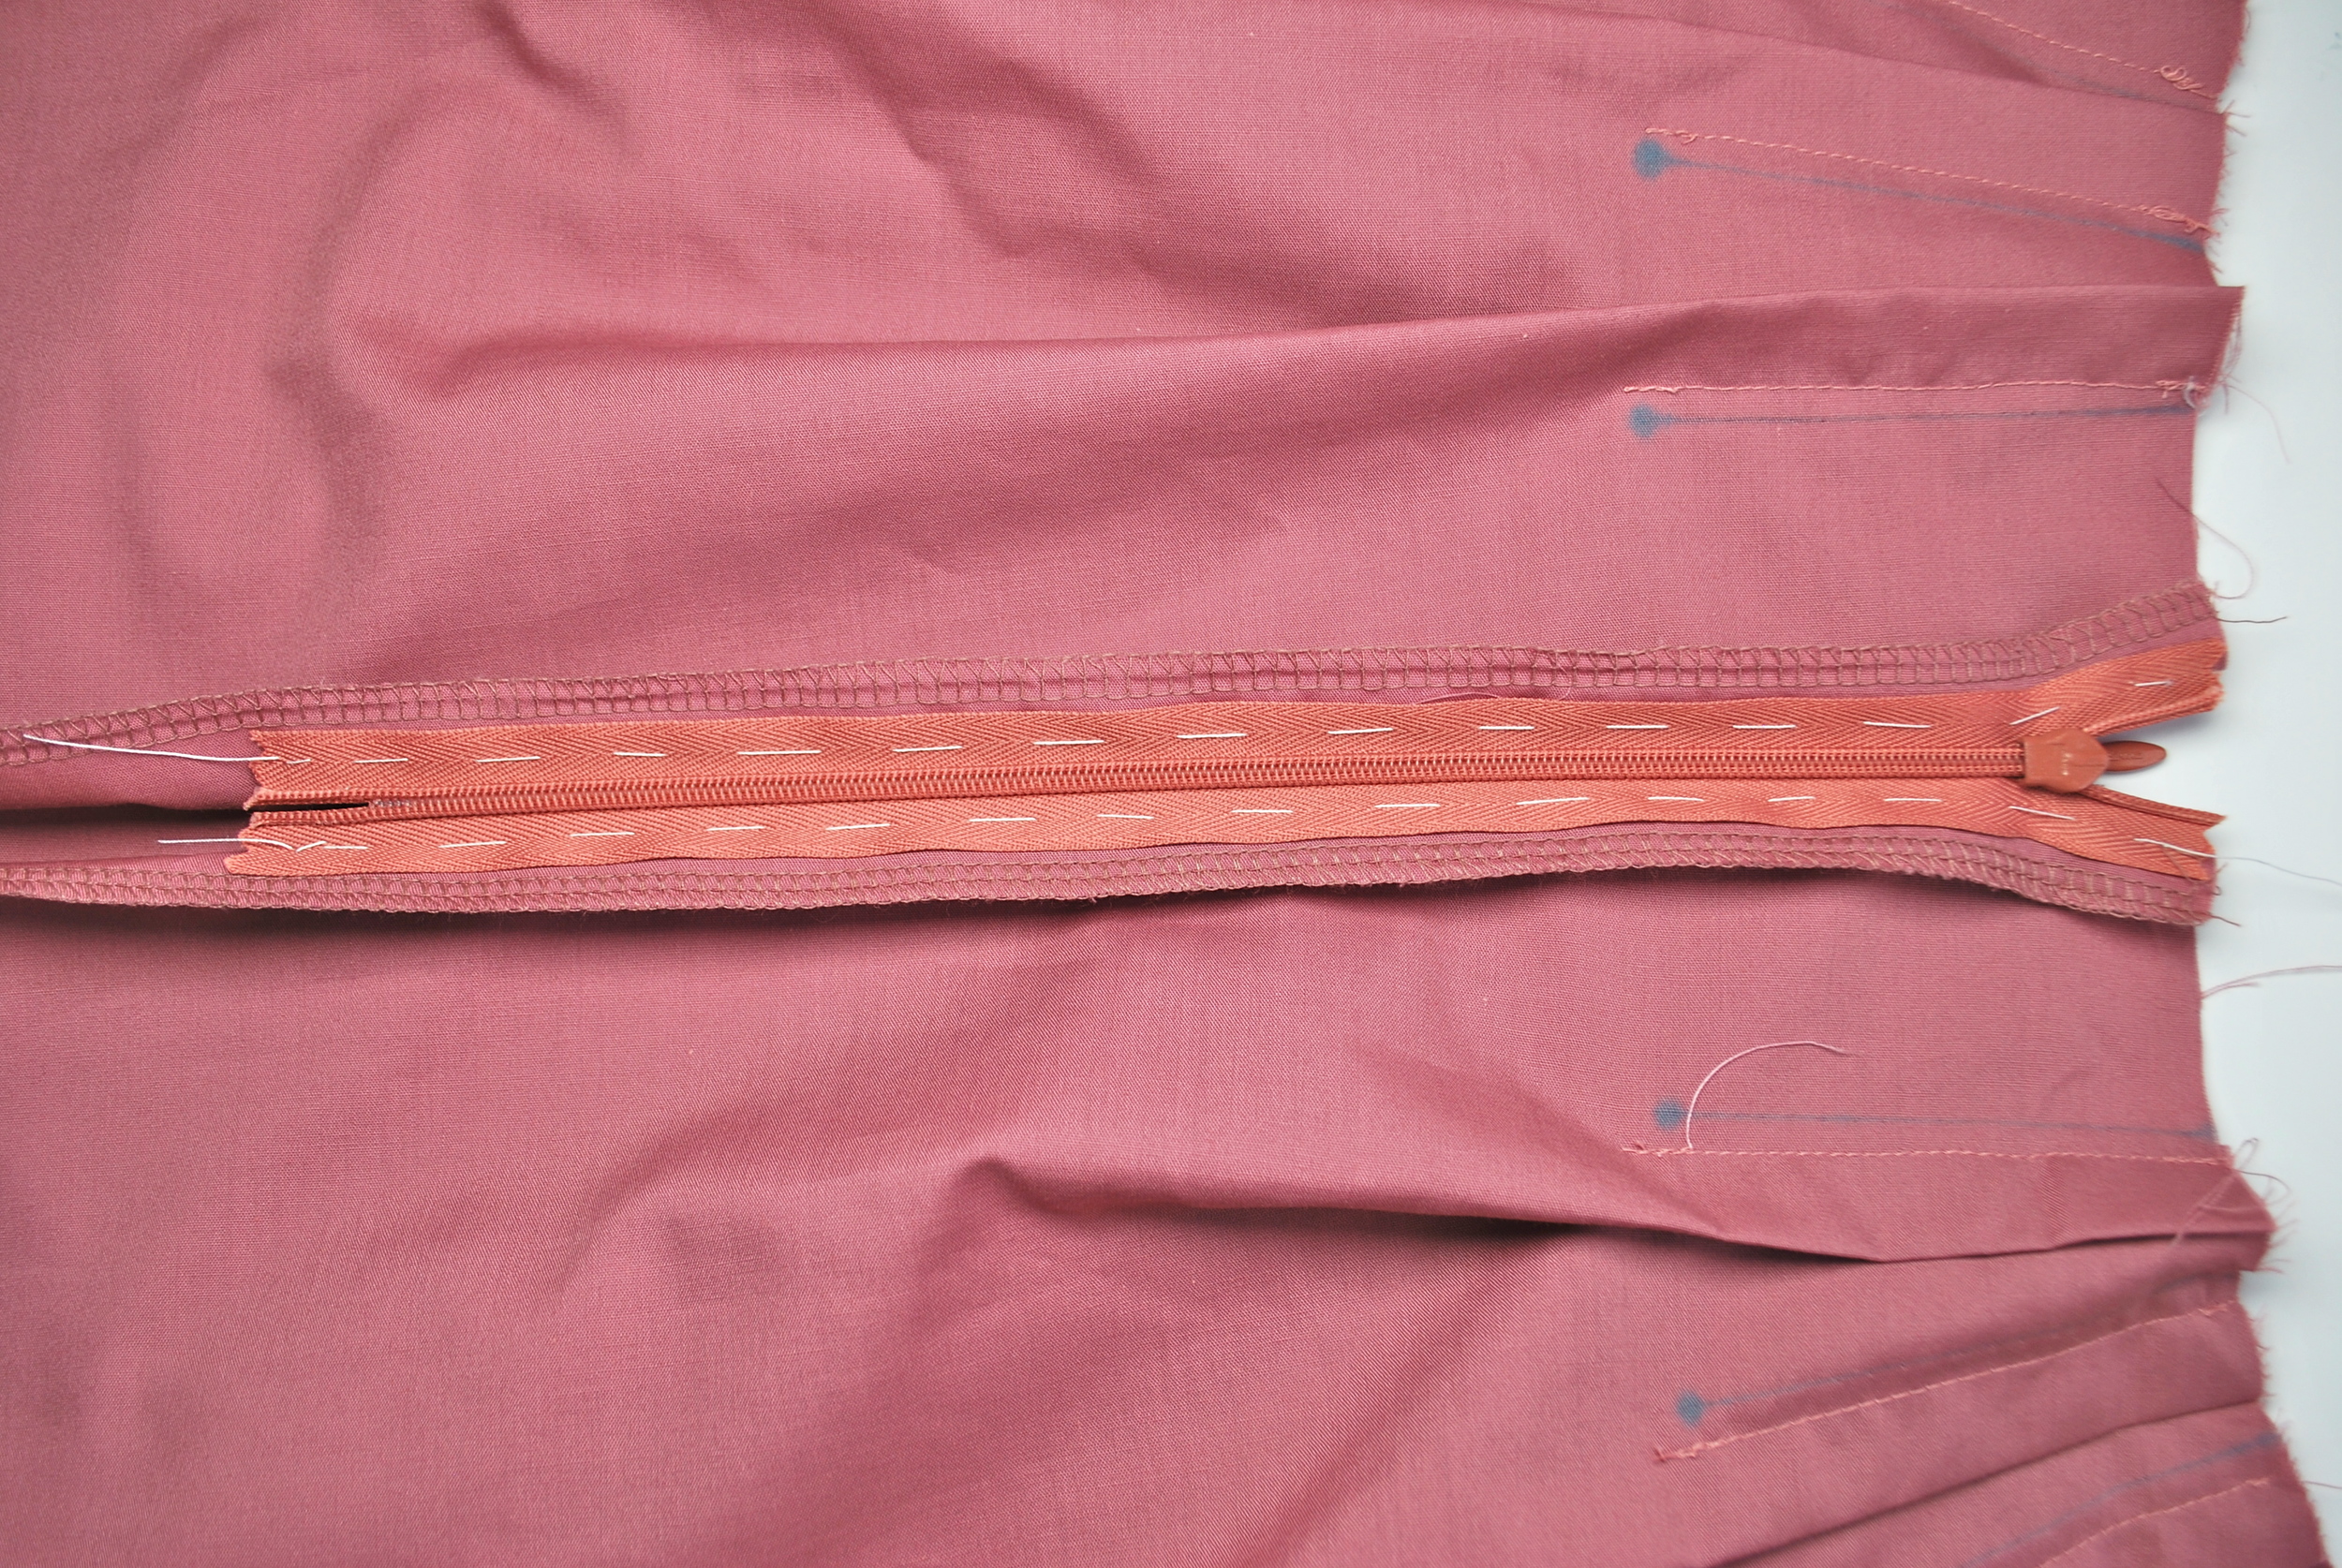
STEP 5
STEP 6 – Attach your invisible zipper foot onto your machine. Bring your top thread through the window of your foot. To do this, I usually use my handwheel to do one complete stitch, as if picking up my bobbin thread. Then I use something long and thin like embroidery scissors or seam gauge to pull the thread underneath the foot and towards the back of the machine.

STEP 6
STEP 7 – The first side of the zipper we’re going to stitch is the left-hand side.
Place the zipper teeth into the left-hand groove of the zipper foot. When we come to do the right-hand side of the zipper, we’ll swap to the right-hand groove.
STEP 7

STEP 8
Beginning with a backstitch, start your straight stitch. If you happen to get stuck on one of the little concealed plastic zipper stops near the top, then stop stitching, lift the foot slightly and bring it back down just past the plastic stop. If you keep stitching, hoping to force your way past it, you will probably just create a big mess of thread!
Continue stitching until you reach the zipper pull at the bottom of the zipper. Finish with a backstitch. Clip your threads nice and close to the backstitch to ensure loose threads don’t get caught in the zipper.
STEP 8 – Stitch the right-hand side of the zipper by following the same steps as the left. Remember to use the right-hand groove of the zipper foot.
SIDE NOTE
Your stitch should be concealed by the zipper teeth. When you pull back the teeth you should see your stitch right in the crease, where the teeth fold over. If it's not in the crease, the zipper may be visible from the right side of the garment. This would defeat the purpose of using an invisible zipper.

Zipper as it normal looks
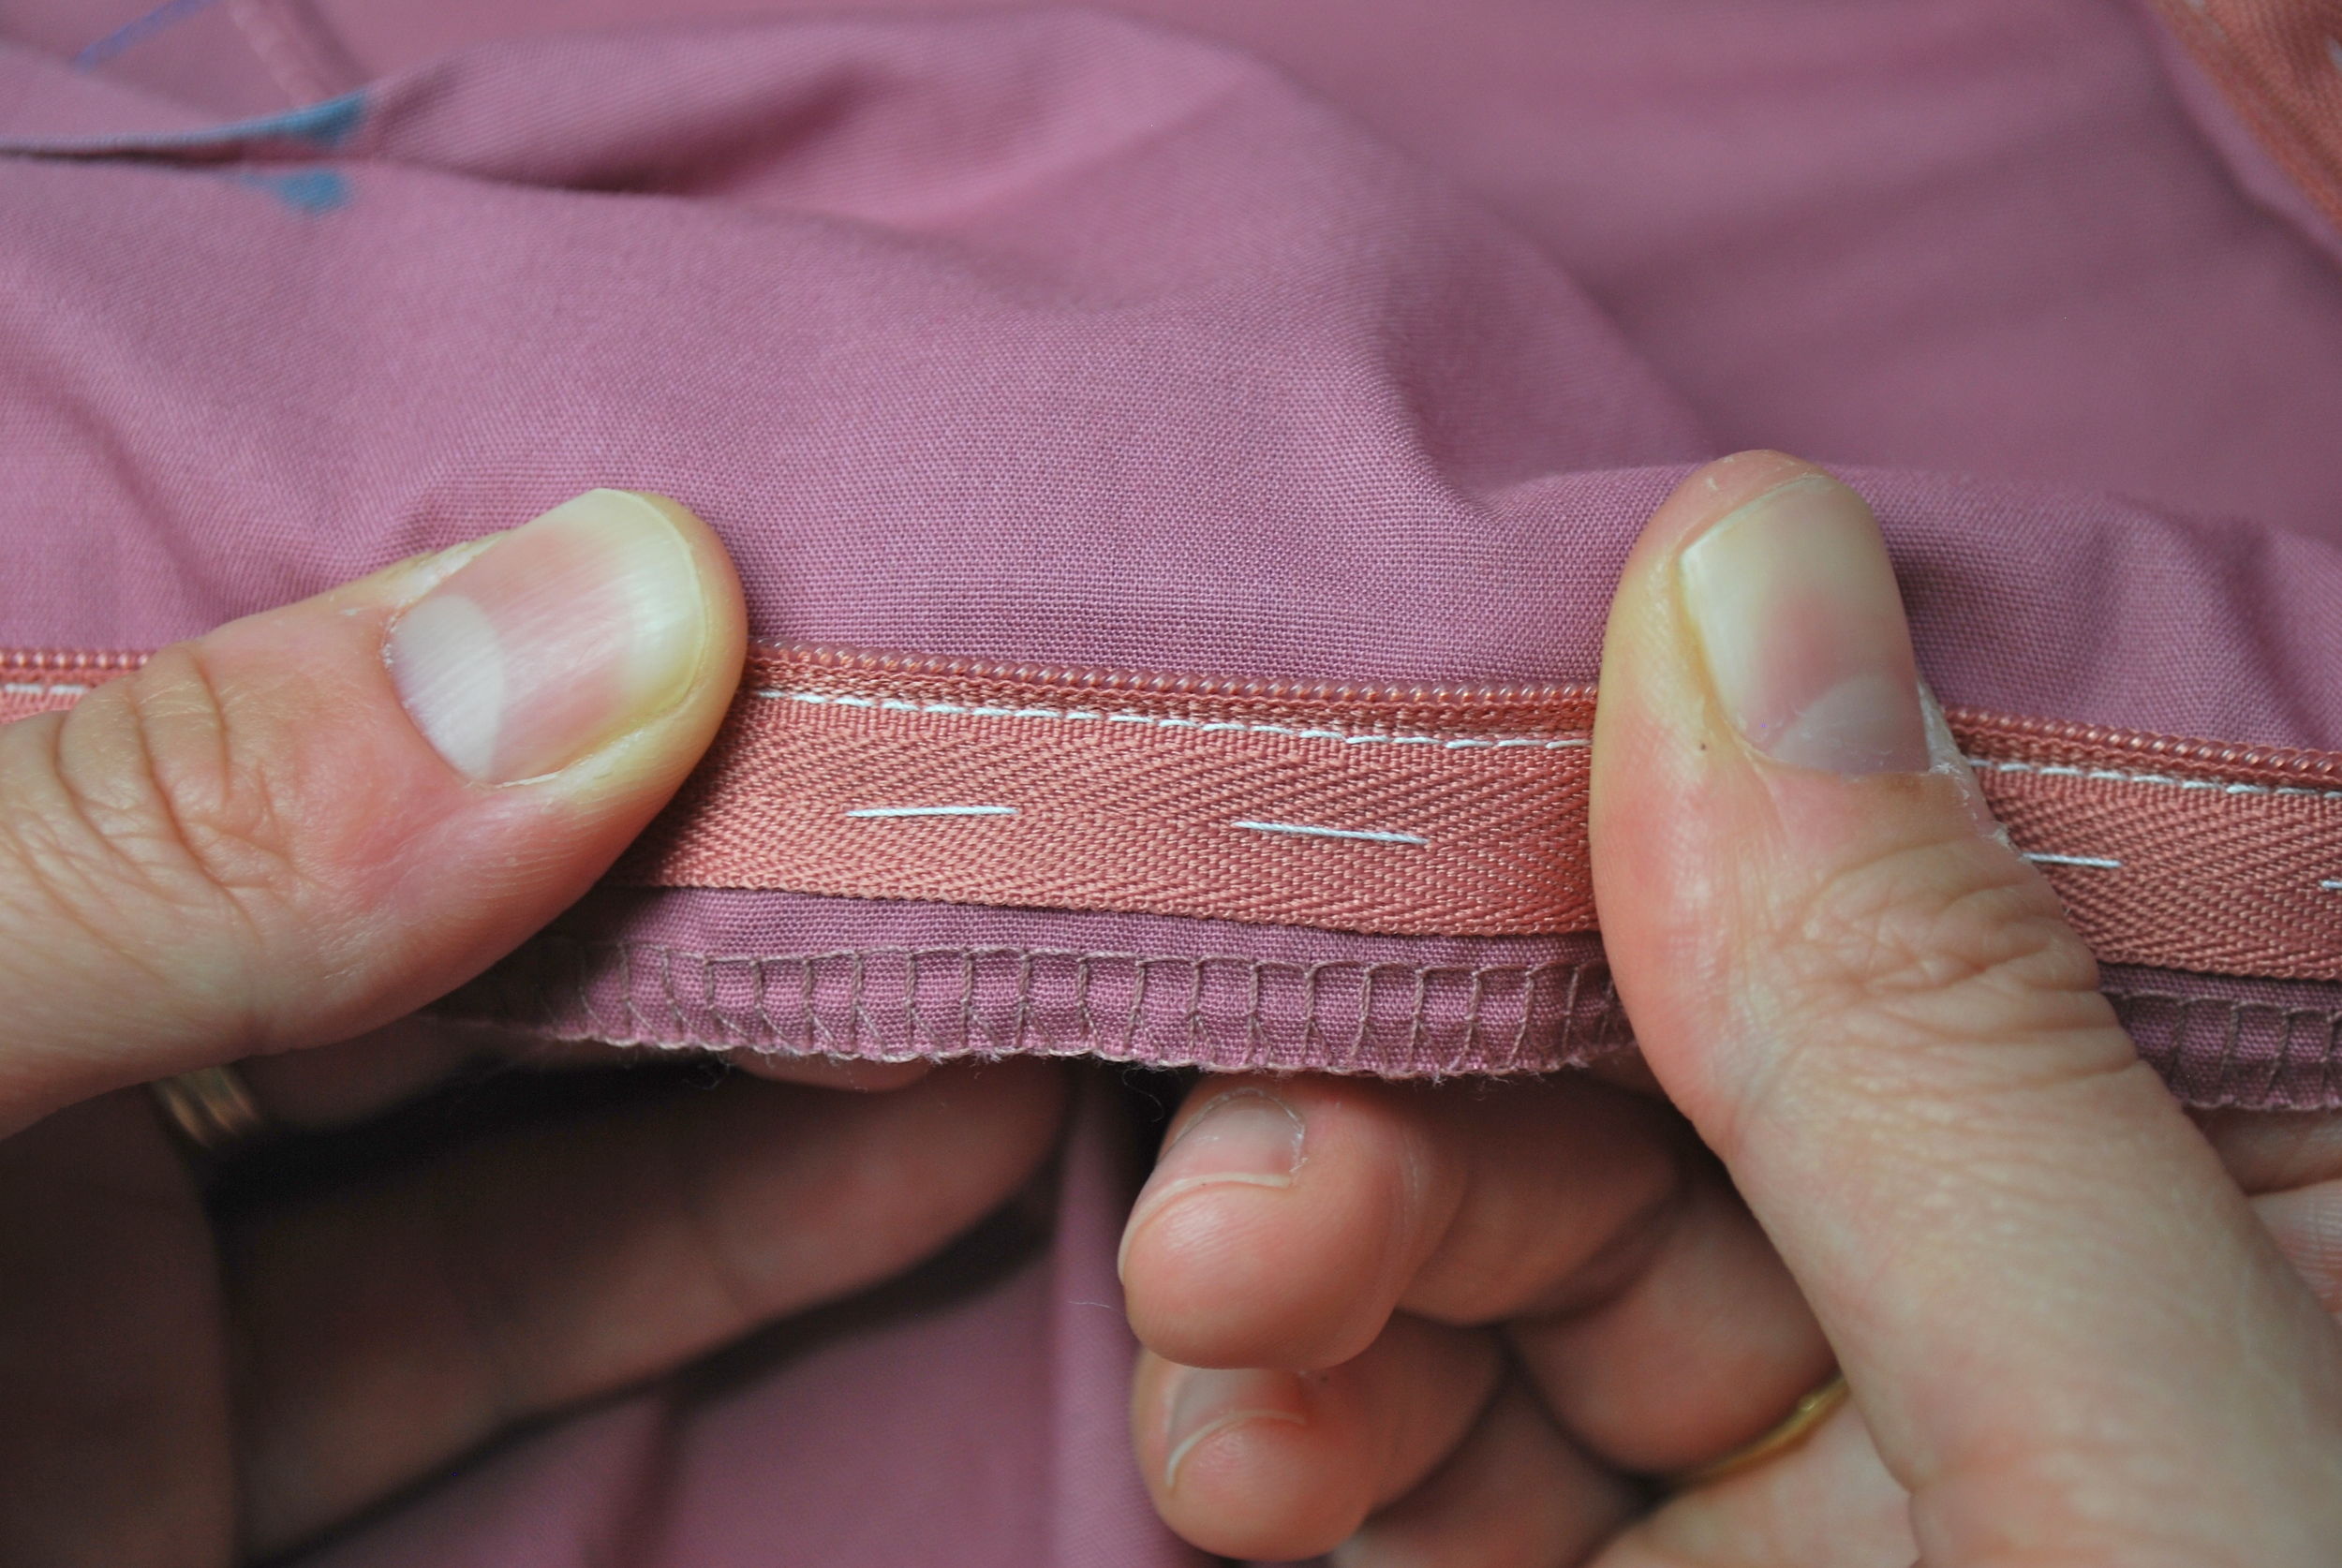
With the teeth rolled back to reveal the stitch line
STEP 9 – The next thing we want to do is change the invisible zipper foot out for an adjustable zipper foot (or a regular zipper foot if you don’t have an adjustable one).
Use the small wrench that came with your sewing machine to unscrew the screw to the left of the Presser Foot. Then insert your adjustable zipper foot by wrapping the prongs around the Presser Foot Bar, reinserting your screw through the centre of the prongs. Screw on as far as you can by hand, then tighten with the wrench key.
To adjust the position of the zipper foot, loosen the hand nut (usually green) at the rear and slide the foot left, positioning the needle just to the right-hand-side of the foot. There should be around 2mm clearance between the needle and the foot, just to make sure they don't collide. Check this by bringing the needle down using your hand-wheel.

STEP 9a - Removing the zipper foot holder with a wrench key

STEP 9b - Inserting the adjustable zipper foot
STEP 10 – Next we’re going to sew the back seam closed, below the zipper.
Bring the zipper pull to the top so that it’s fully closed. Pin the back seam, matching the finished edges, and checking the hem edge matches. If it doesn't match you can simply trim it to match.

STEP 10
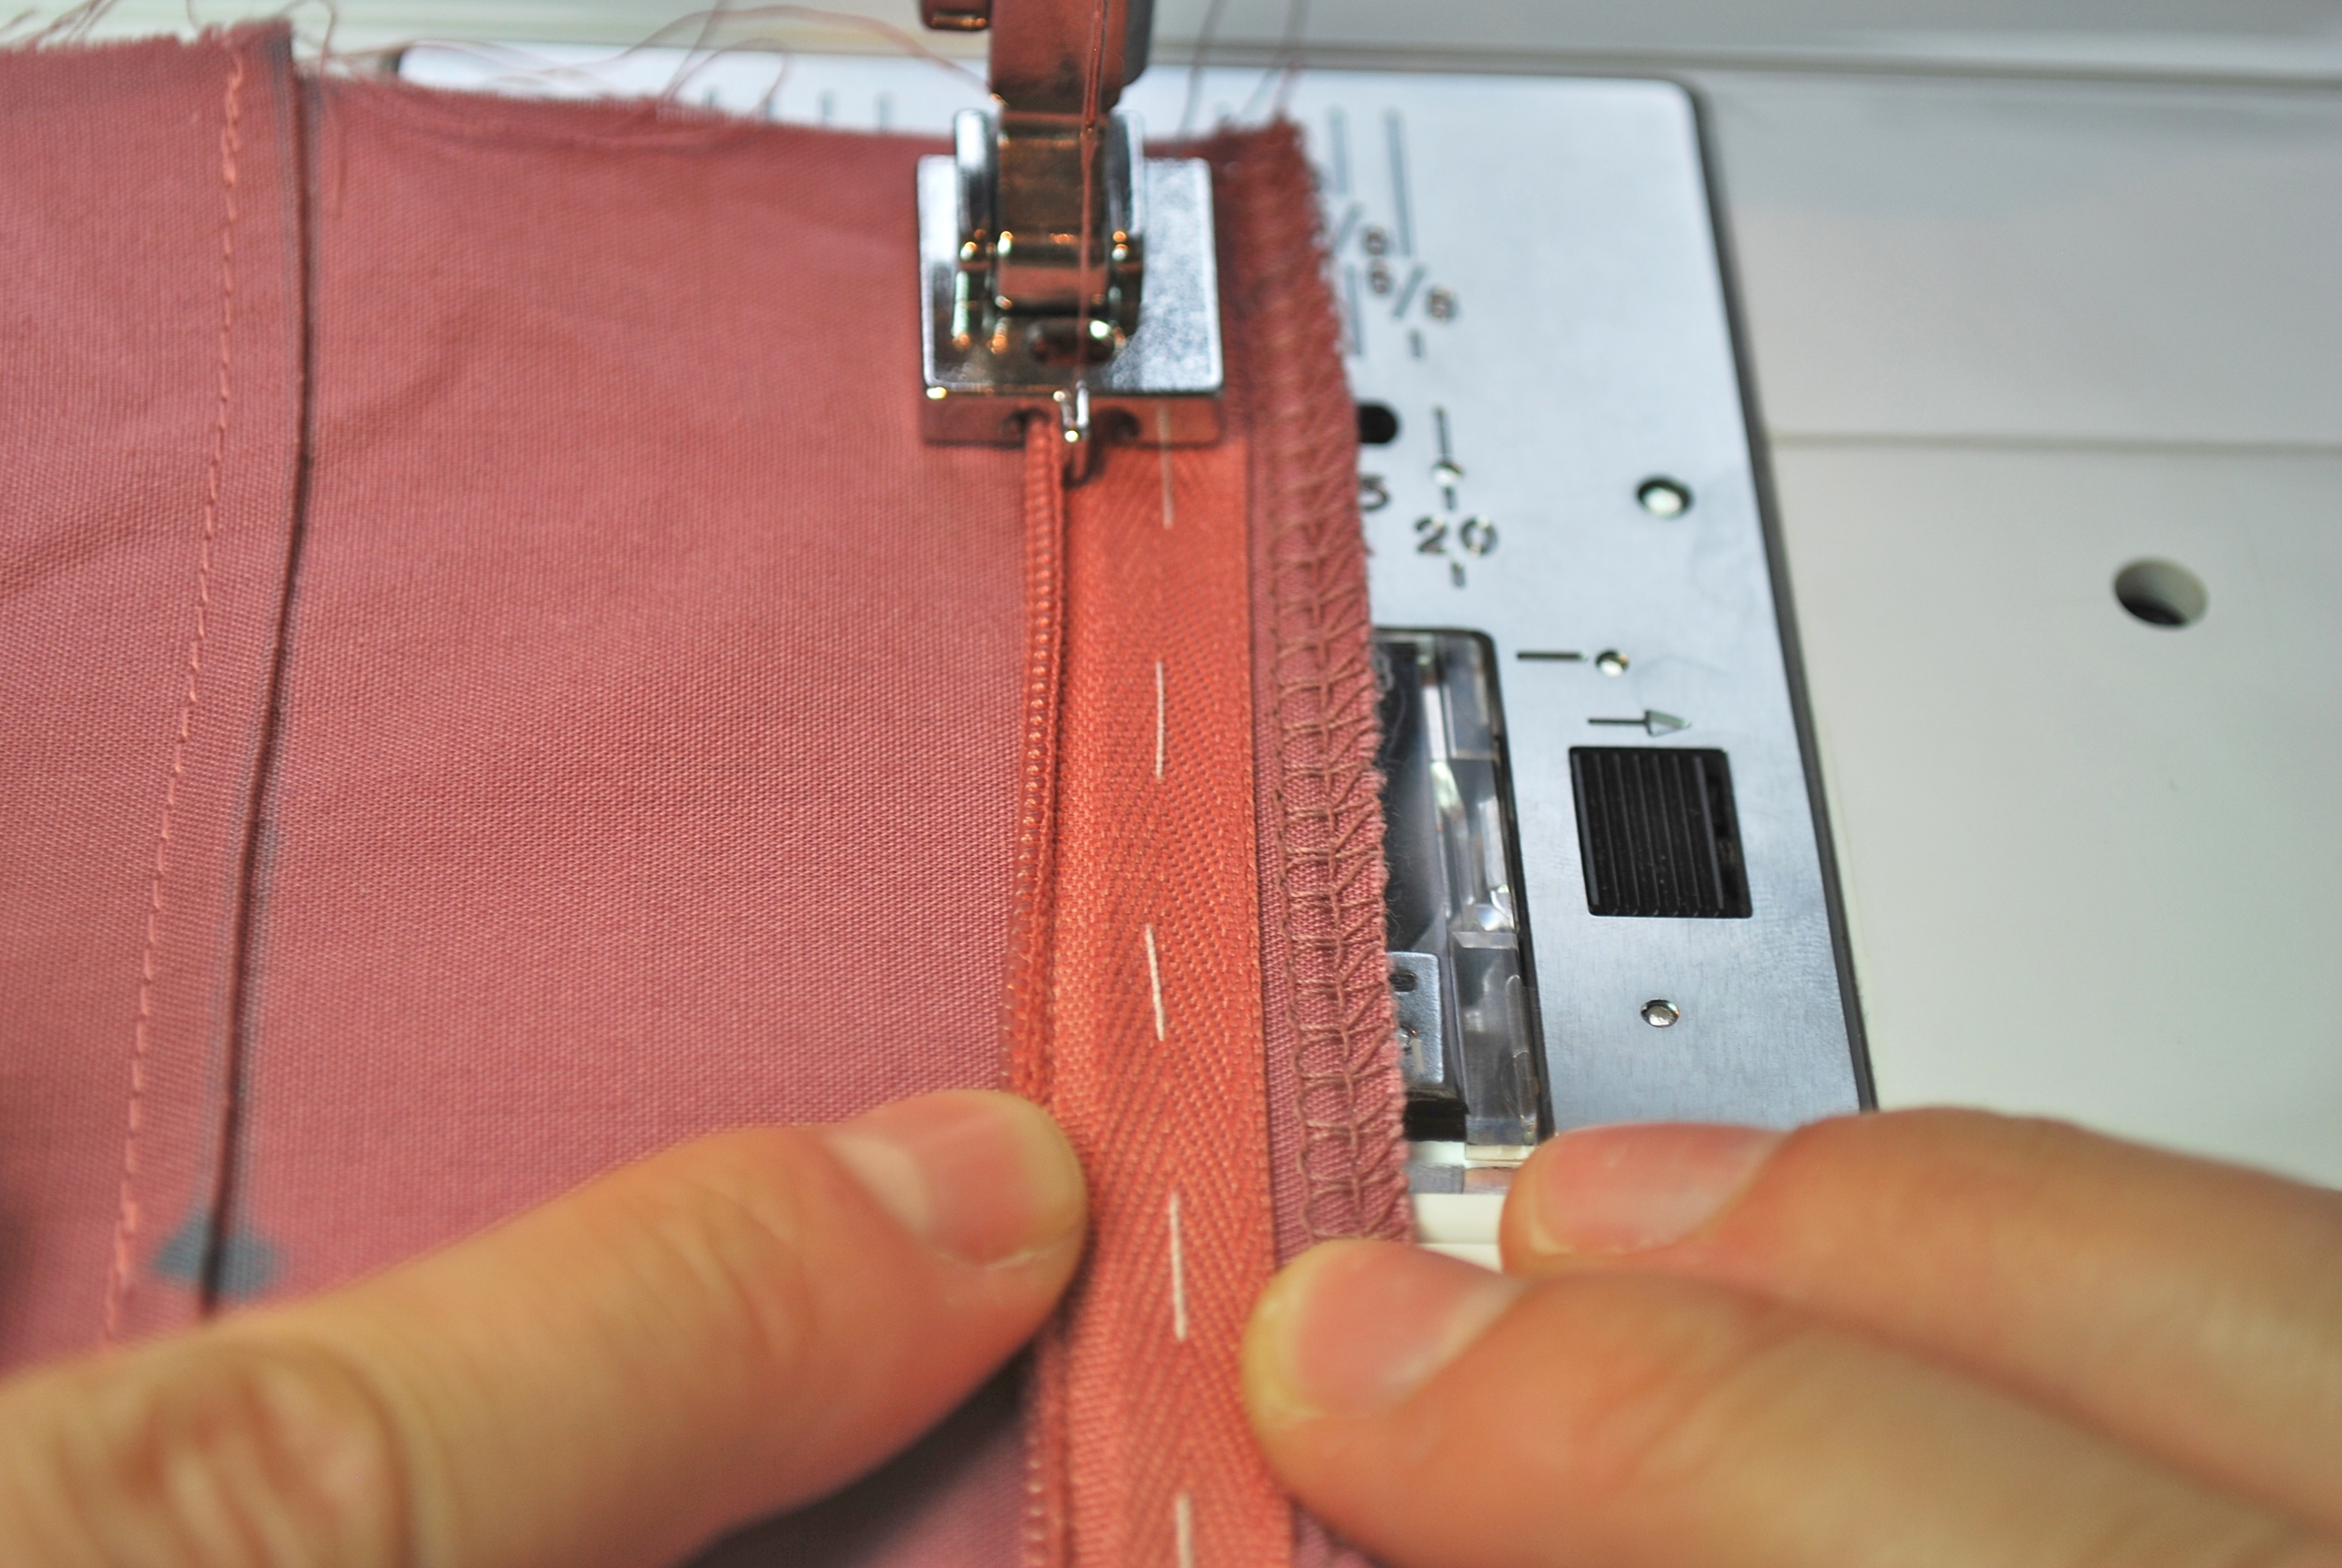
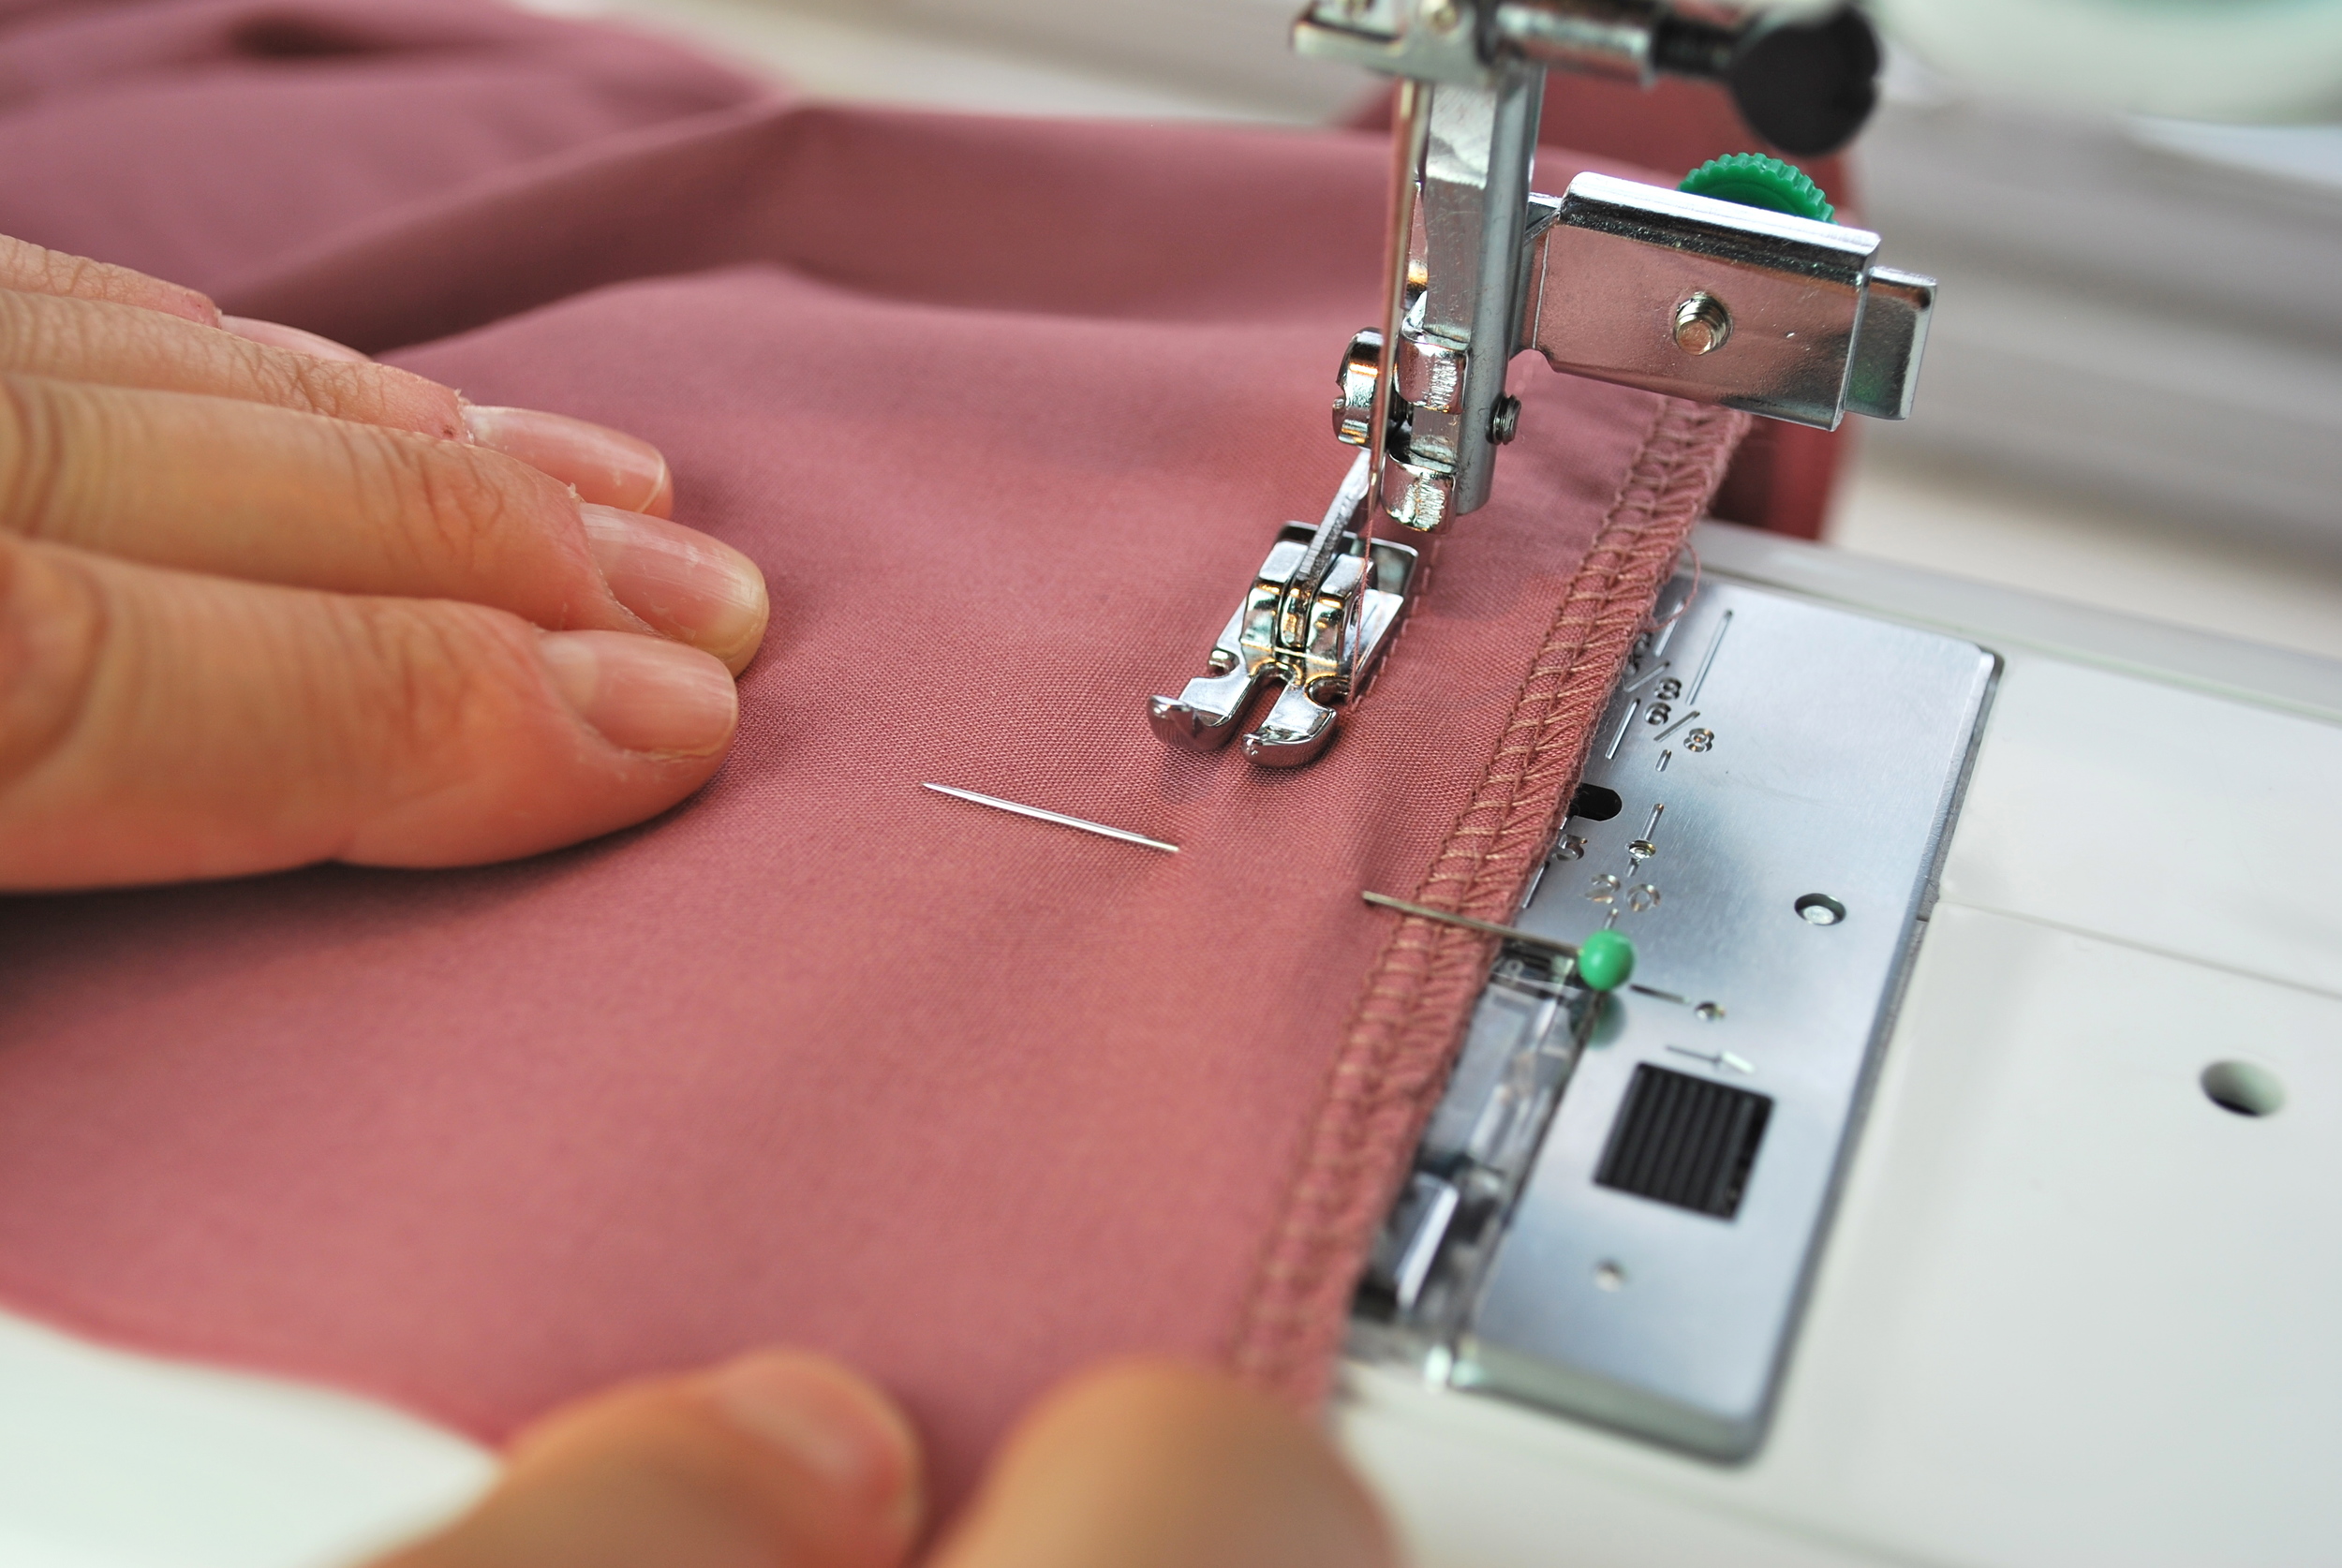
STEP 11 – Position your back seam by slipping it under the presser foot, as shown in the image below. Start by bringing your zipper foot down so that it sits around 1 inch above your zipper stitch. This overlap of the zipper stitch and the back seam stitch adds strength.
You will find that your zipper seam want to fold out towards your stitch, making it difficult to sew. To prevent this, hold the seam allowances together with your right finger as I've shown below. You'll only need to do this until you've stitched passed the bottom of your zipper.
As you begin your stitch, ensure that you're keeping as close to the zipper stitch as possible. And always remember your backstitch at the start.

STEP 11a
Continue stitching past the bottom of the zipper at the standard 5/8" seam allowance, until you reach the hem. Backstitch at the end.
STEP 11b - Continue stitching at 5/8" until you reach the hem of your skirt.
The image below shows how the two overlapping stitches should look once you've completed your back seam.
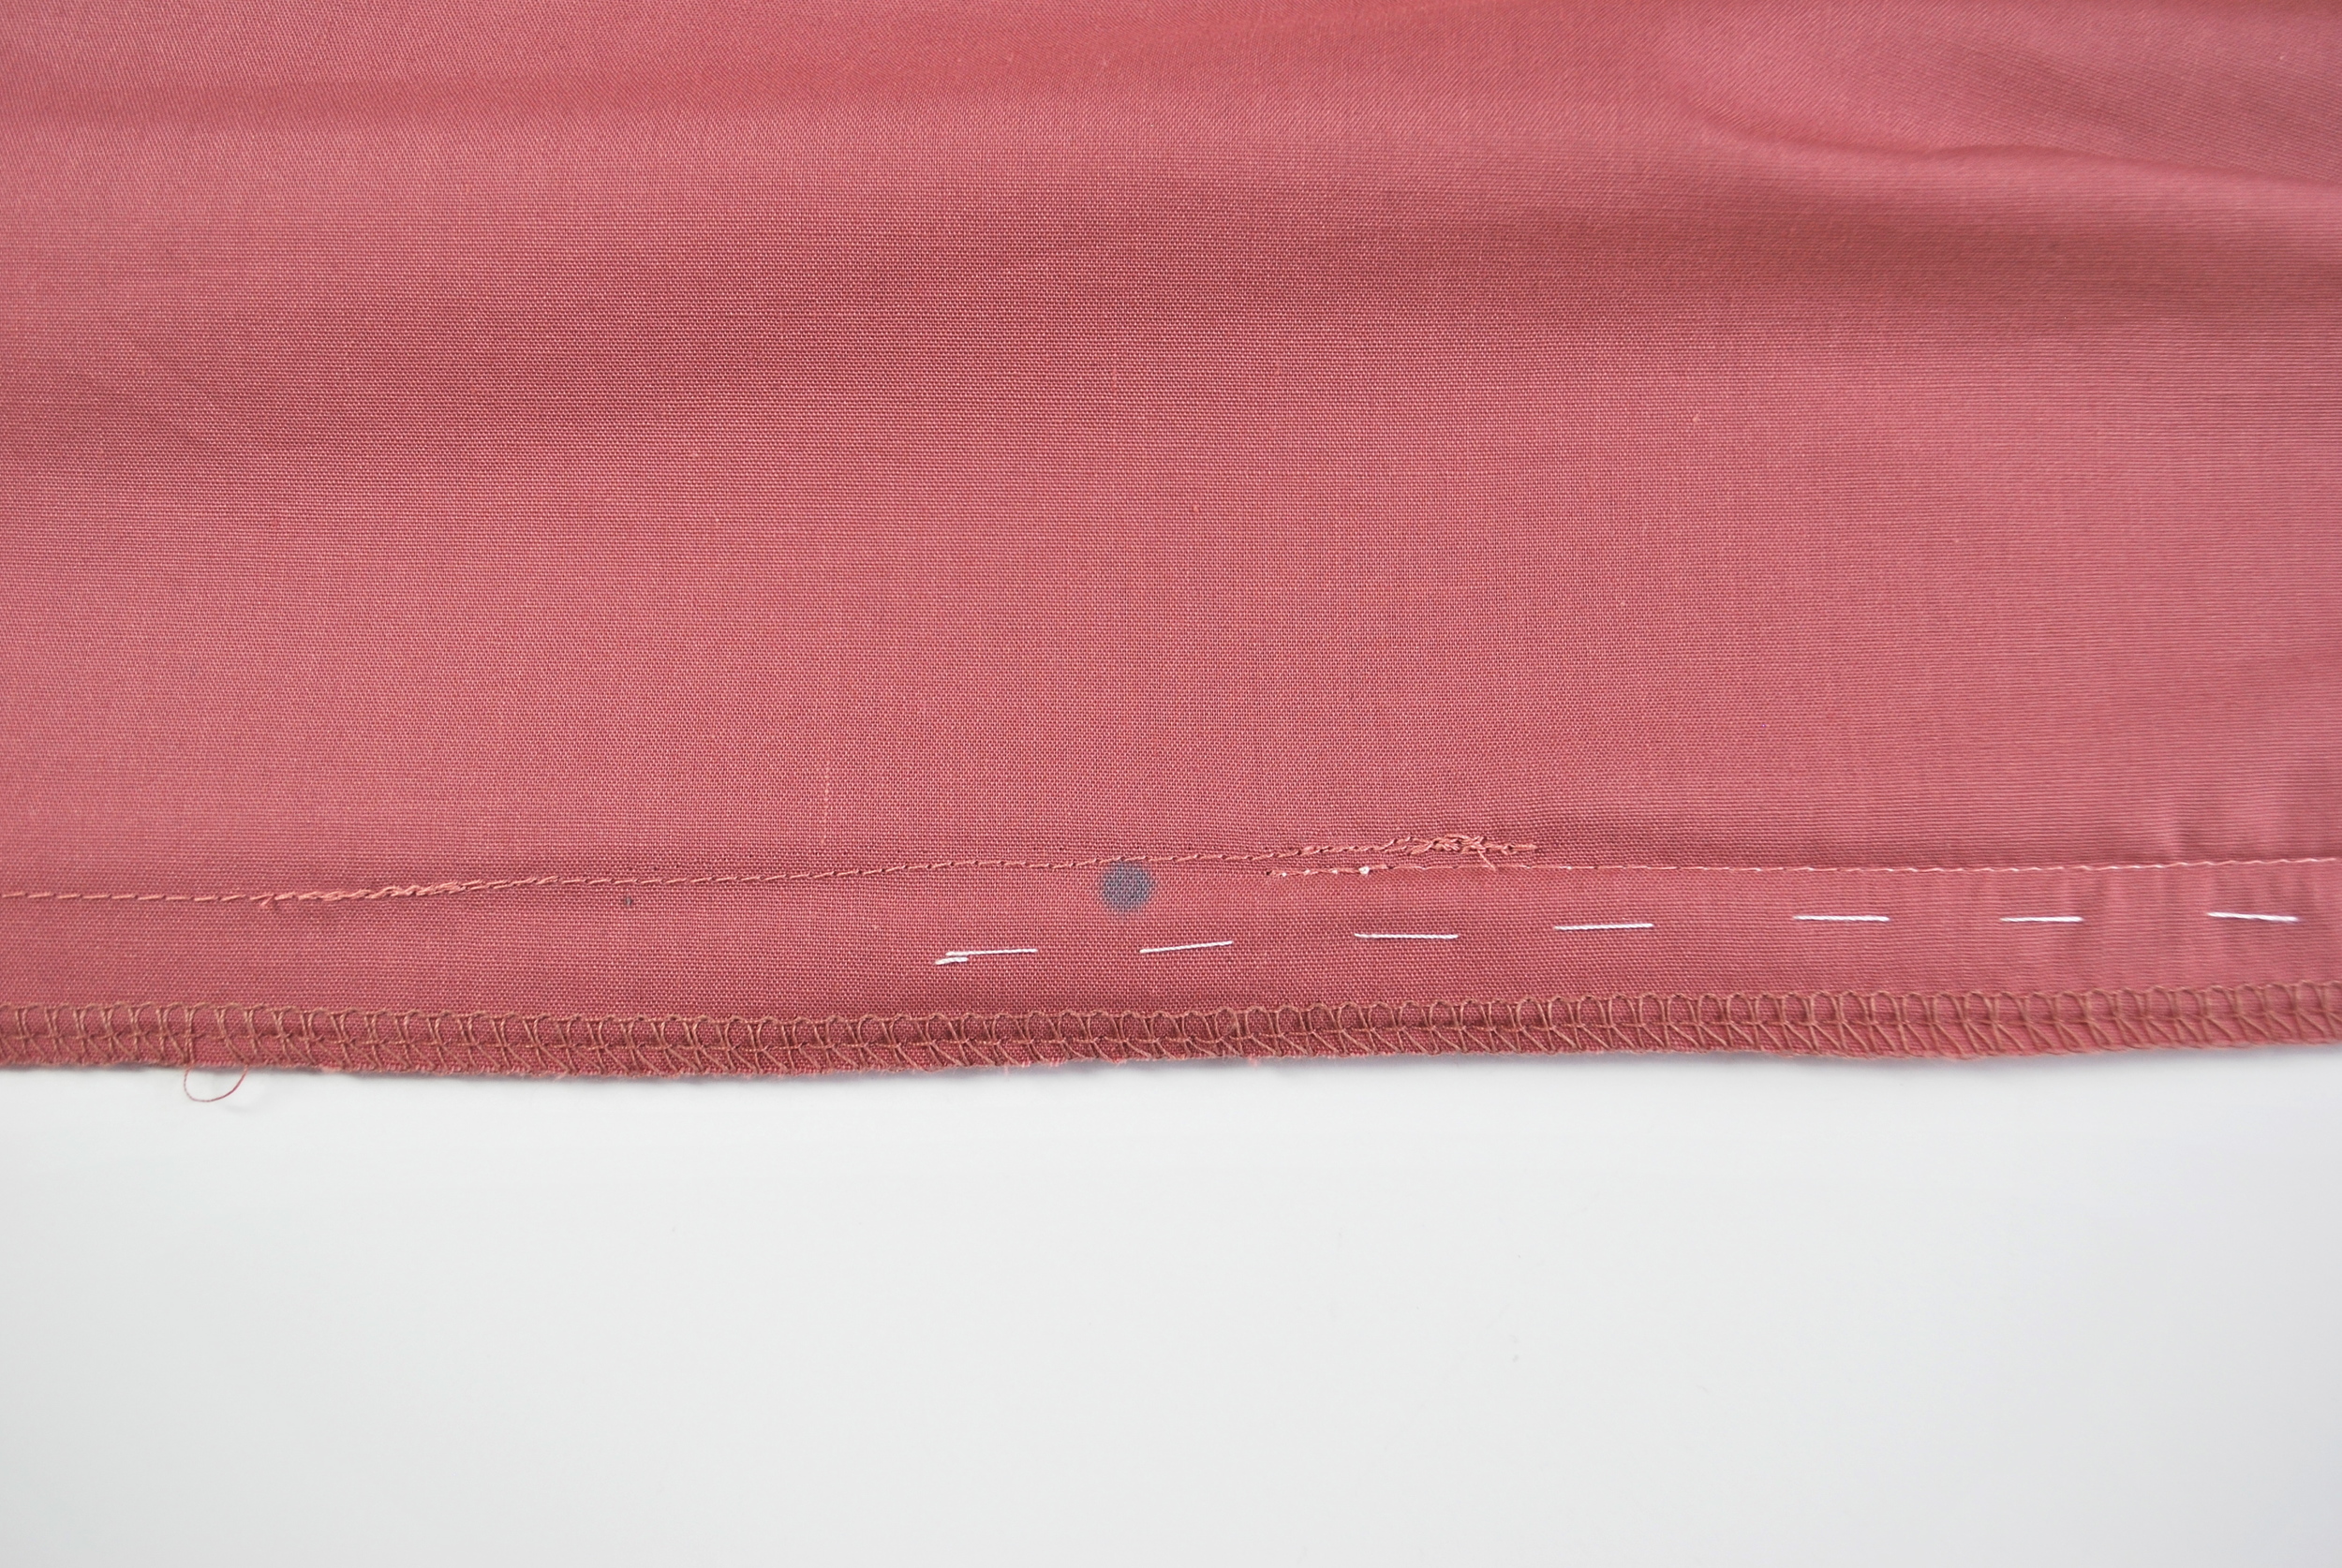
STEP 11c - The back seam seam stitch overlaps with the zipper stitch.
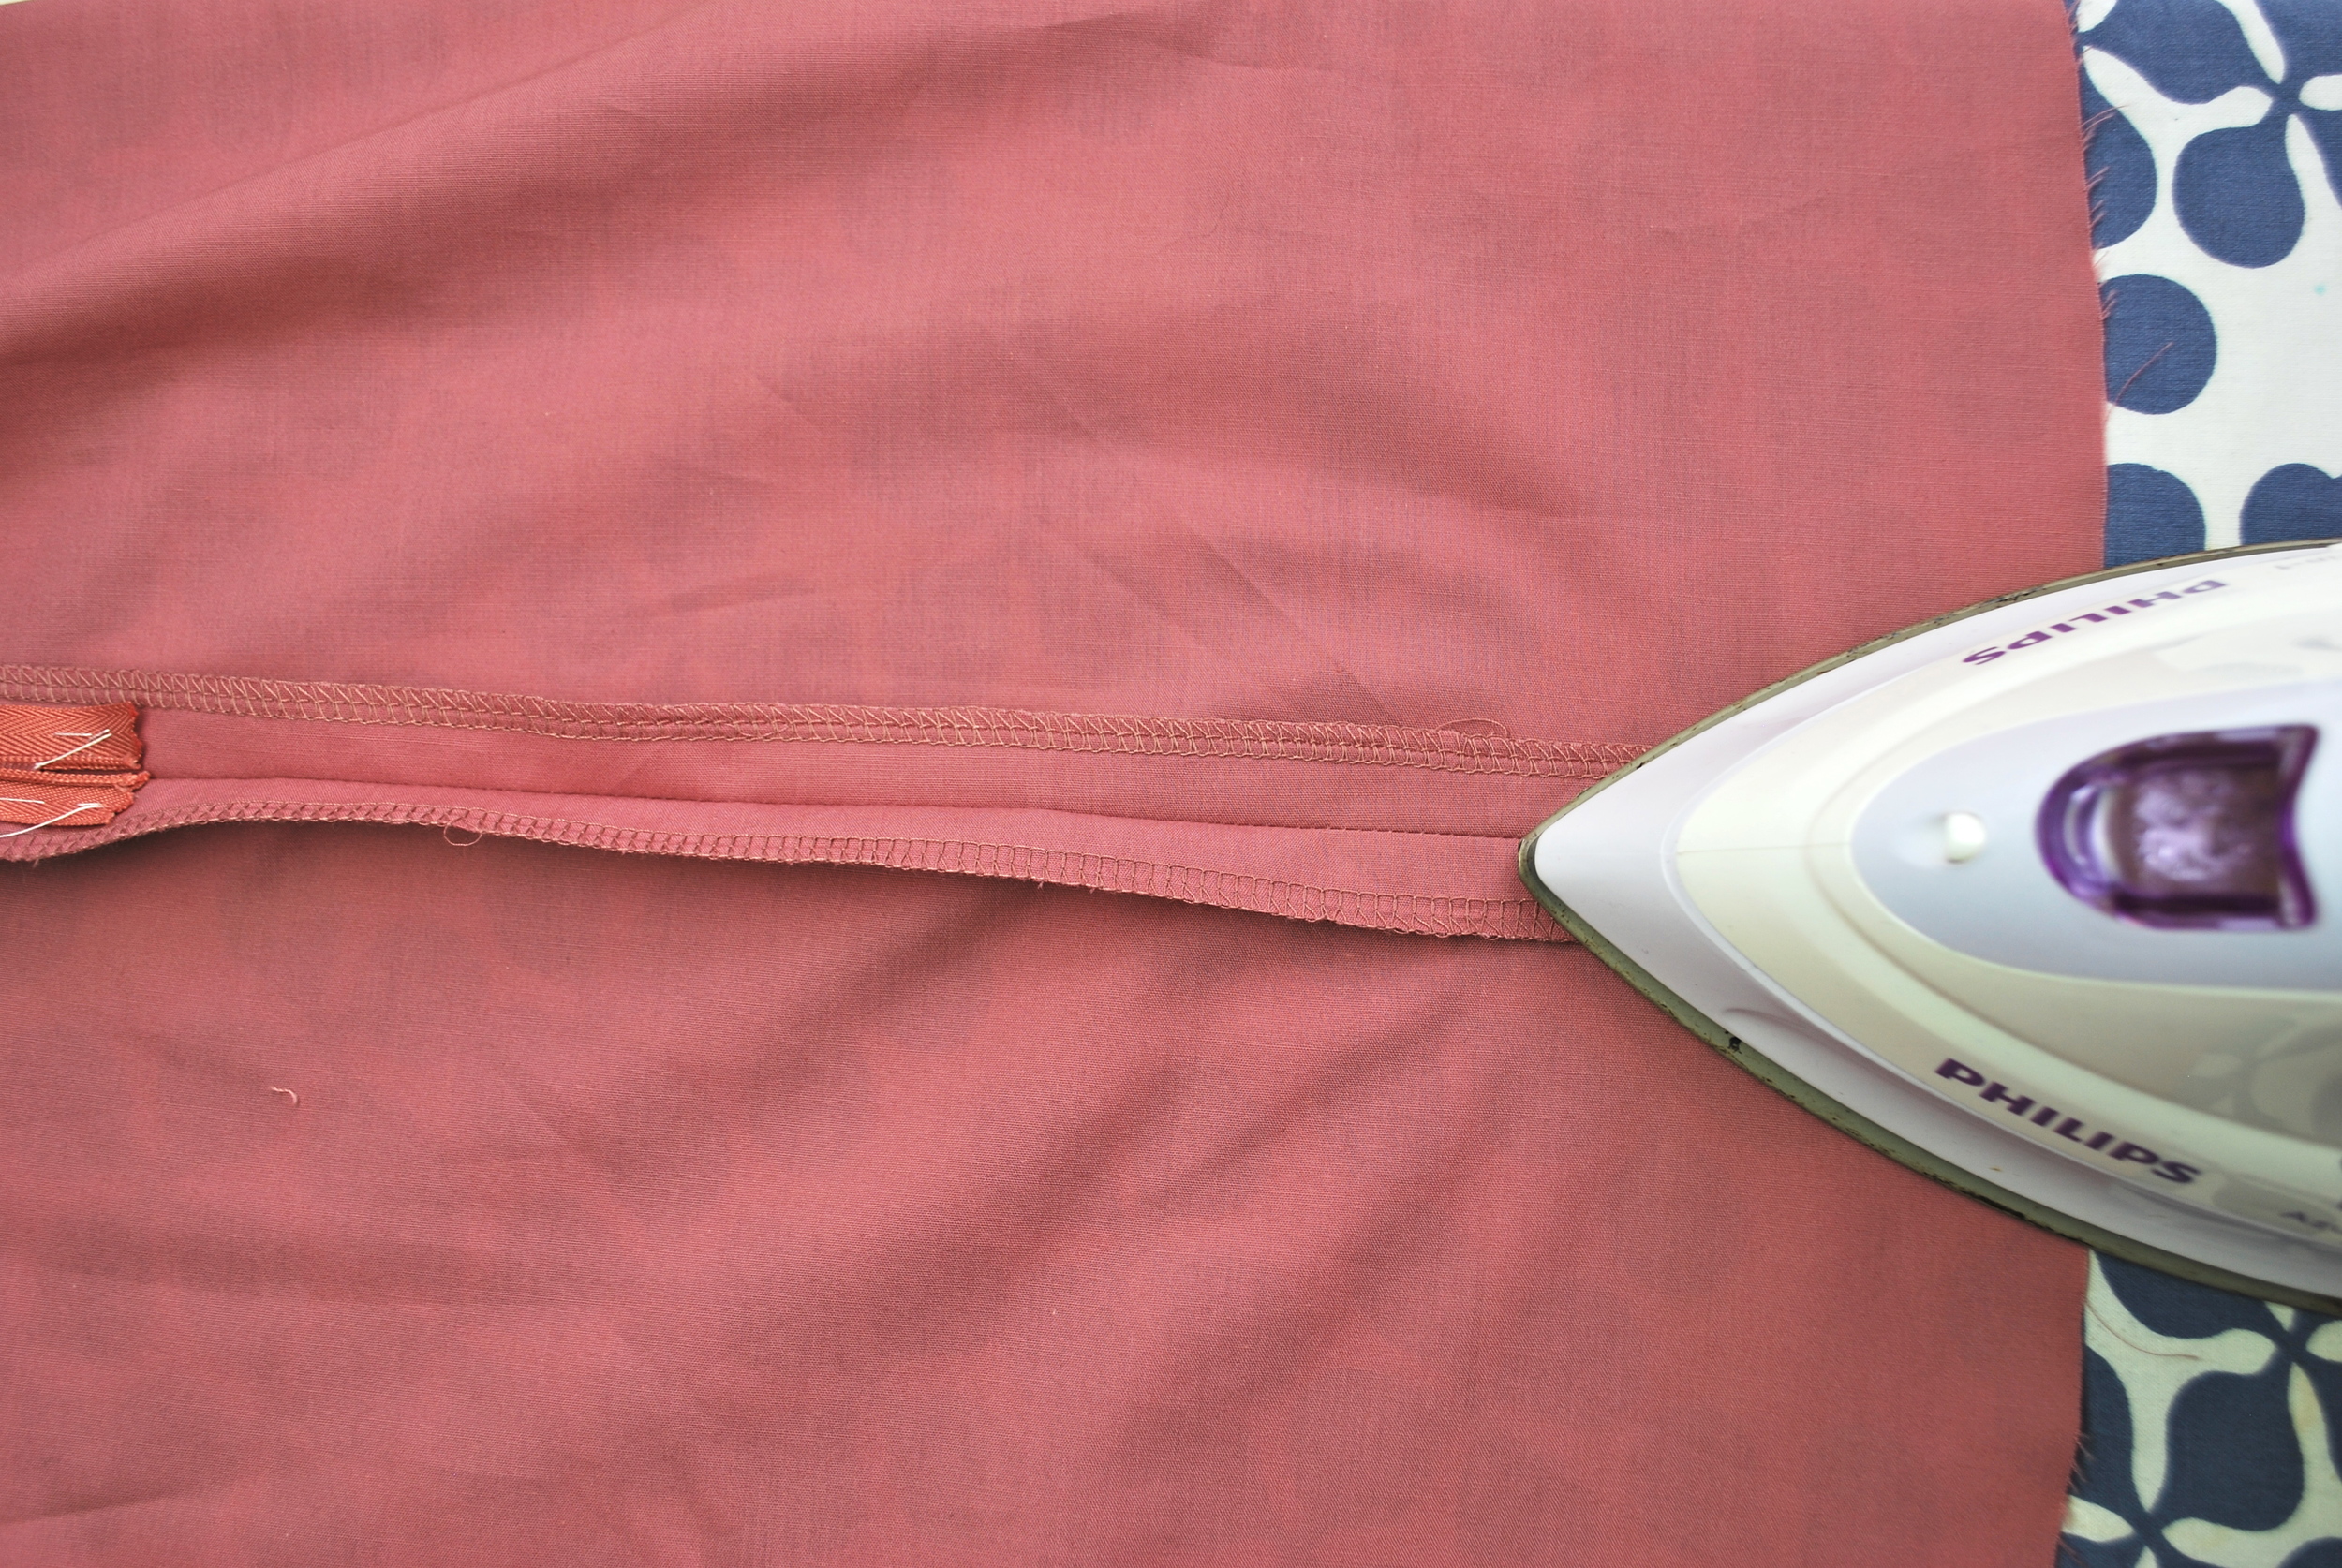
STEP 12 - Press your seams from the wrong side. As we mentioned in a previous post, remember to press the seam to one side first, then press open. This helps strengthen your seam.
Once you've pressed it from the wrong side, turn it right side out and press again. At this point you can press from the right side of the zipper seam. Just be careful not to hold the hot iron over the plastic zipper teeth for too long.
STEP 13 - The final step is to remove your basting stitches. Tada!
STEP 12